
Author
Most people think planning an RV trip is just like planning a road trip.
It isn’t.
In a car, you open Google Maps, type in a destination, and drive. In a 38-foot motorhome weighing 26,000 lbs with a 13’2″ roofline, that same approach will eventually put you under a bridge you can’t clear, on a road your rig doesn’t fit, or in a campground that won’t take anything over 30 feet.
I learned this the hard way. You don’t have to.
This guide walks you through every step of planning an RV trip — whether it’s your first time or your fiftieth. From sizing up your rig to rolling into your campsite before dark, here’s exactly how we do it after three years of full-timing across 40+ states.
Why RV Trip Planning Is Different From Car Travel
Before we get into the steps, let’s be clear about what makes RV travel genuinely different — because understanding this changes how you approach everything else.
Your vehicle has physical limitations a car doesn’t:
- Height restrictions on bridges, tunnels, and overpasses
- Weight limits on older bridges
- Length restrictions on certain roads and campsites
- Propane restrictions in tunnels (most major tunnels in the US ban propane)
- Turning radius that makes tight switchbacks and urban streets dangerous
Your campsite is also your home:
- You need utilities (water, electric, sewer) or the gear to go without them
- Setup and teardown take time — arriving after dark is stressful
- A bad campground isn’t an inconvenience. It’s where you’re sleeping.
Weather and seasons matter more:
- High winds are dangerous when you’re a 40-foot sail on wheels
- Freezing temperatures mean winterizing your water lines
- Summer heat means budgeting for full-hookup sites with electric for A/C
Step 1: Know Your Rig — Before You Plan Anything
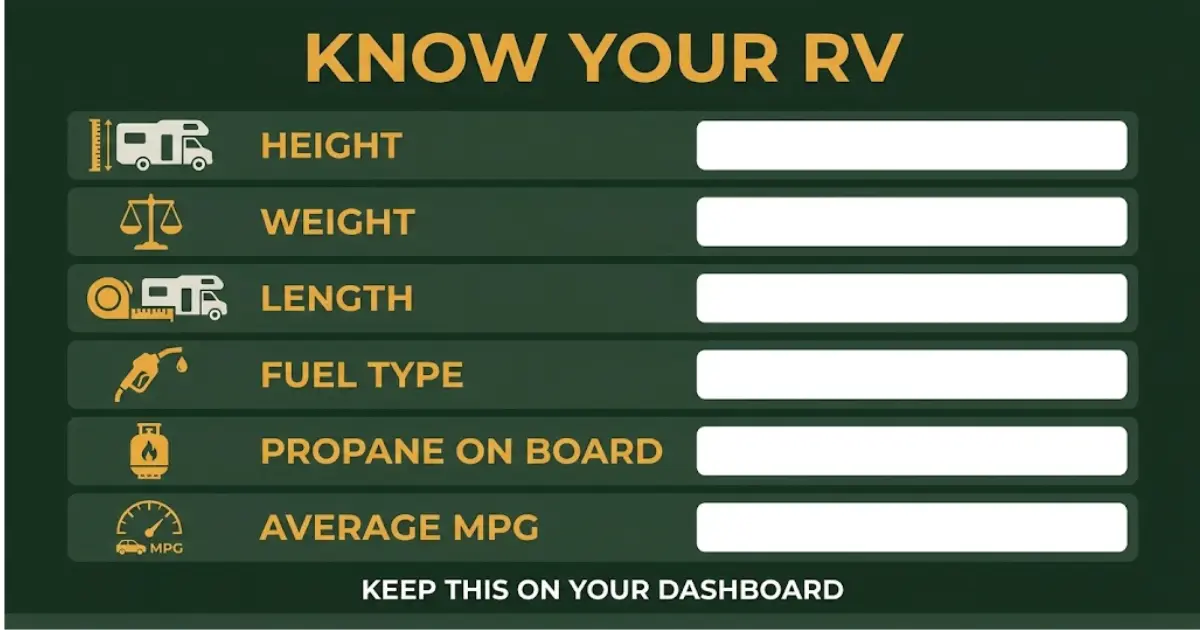
This sounds obvious. Most people skip it. Write these numbers down and keep them on your dashboard:
| Spec | Your Rig |
|---|---|
| Total height (including A/C, antennas, solar) | _____ |
| Total weight (GVWR fully loaded) | _____ |
| Total length | _____ |
| Fuel type | Diesel / Gas / Electric |
| Propane tanks on board? | Yes / No |
| Average MPG | _____ |
Why height matters: Bridge clearance signs often reflect the original height — repaving can lower actual clearance by several inches. Subtract 6 inches from any posted clearance as a conservative buffer.
Why propane matters: Most major tunnels in the US prohibit propane. If you’re crossing the I-70 Eisenhower Tunnel in Colorado or the Baltimore Harbor Tunnel, you need to know this in advance.
Step 2: Plan Your Route — RV Safe, Not Just GPS Fast
This is where most first-time RV travelers make their biggest mistake. Google Maps will give you the fastest route. It will not give you the safest route for your specific rig. It doesn’t know your height, your weight, or your propane status.
The right tool: RV LIFE Trip Wizard
Here’s the setup process (takes about 10 minutes, once):
- Create your vehicle profile — enter height, weight, length, fuel type, propane yes/no
- Set your daily driving preferences — average speed, max hours per day
- Enter your start and end points
- Let Trip Wizard generate an RV-safe route
From that point on, every route it generates avoids low clearances, weight restrictions, propane tunnels, steep grades, and roads too narrow for your length.
The Driving Radius Tool — For Flexible Travelers
If you don’t have a fixed itinerary, use Trip Wizard’s driving radius feature. Set your maximum daily driving hours — say, 4 hours — and the tool draws a circle showing every campground you can comfortably reach from your current location. This is how we plan most of our travel.
Step 3: Choose and Book Your Campgrounds
Types of Campgrounds
| Type | Hookups | Price Range | Best For |
|---|---|---|---|
| Full hookup RV park | Water + Electric + Sewer | $40–$80/night | Convenience, A/C users |
| Partial hookup | Water + Electric only | $25–$50/night | Most trips |
| Dry camping | None | $10–$25/night | Self-sufficient rigs |
| Boondocking (free) | None | Free | BLM, National Forest |
| Harvest Hosts | None | $99/year membership | Unique experiences |
For Beginners: Start With Full Hookups
If this is your first trip, book a full-hookup site with pull-through spaces. Pull-through means you drive straight in and straight out — no backing up. This removes one of the biggest first-timer stress points.
Where to Research Campgrounds
- RV LIFE Campgrounds (included in Trip Wizard) — 45,000+ sites with RVer reviews. Filter by rig length, hookup type, 55+ communities, pet policies, cell signal.
- Campendium (free) — detailed reviews including road conditions and carrier-specific cell signal data.
- The Dyrt Pro — best for BLM and National Forest dispersed camping.
Booking Timeline
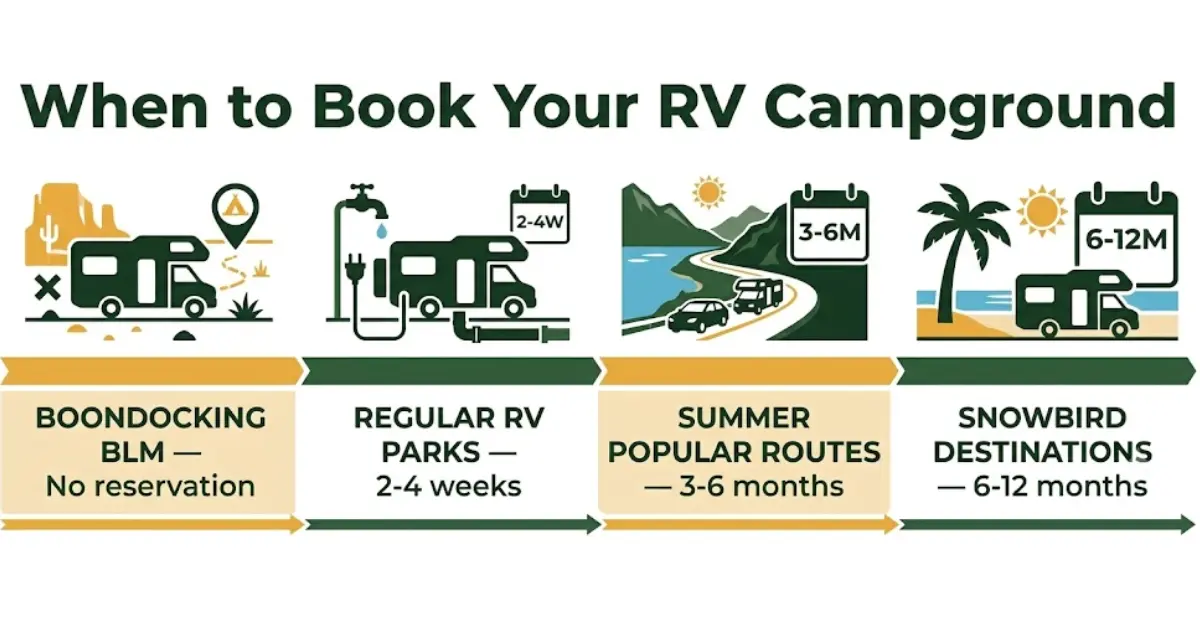
- Popular summer destinations: Book 3–6 months out
- Snowbird destinations (Florida, Arizona, Texas): Book 6–12 months out
- Regular RV parks: 2–4 weeks usually sufficient
- Boondocking (BLM land): No reservation needed — 14-day stay limit
Step 4: Pack Right — The RV Essentials Checklist
Safety Essentials (Non-Negotiable)
- Surge protector (30-amp or 50-amp matching your rig)
- Leveling blocks + wheel chocks
- Drinking water hose (white only) + water pressure regulator
- Sewer hose kit
- First aid kit + fire extinguisher (current)
- Carbon monoxide + smoke detectors (tested)
Tech & Navigation
- Phone dashboard mount
- Offline maps downloaded in Trip Wizard before departure
- Backup power bank
- Wi-Fi booster if you work remotely (WeBoost or Pepwave)
Step 5: On the Road — Arrival and Setup
Before You Leave Every Morning — 5-Minute Check
- Slides retracted
- Awning rolled in and latched
- Steps retracted + exterior compartments locked
- Antenna lowered + all dishes secured inside
- Toilet valve closed + refrigerator on auto/12V mode
- GPS loaded with today’s route (offline if remote)
- Tire pressure checked (cold inflation)
Arriving at Your Campsite
Arrive in daylight. Always. Plan your driving day to arrive at least 2 hours before sunset. Do a walk-around before you unhook anything — check for low branches, uneven ground, tight turns on exit. Level first, connect second.
Setup Sequence
- Position rig + place wheel chocks
- Extend leveling jacks — verify level front-to-back and side-to-side
- Connect shore power with surge protector
- Connect water hose with pressure regulator
- Connect sewer hose
- Extend slides + deploy awning
- Extend steps
Common First-Timer Mistakes (And How to Avoid Them)
- Trusting Google Maps in a large rig → Use RV LIFE Trip Wizard for every route.
- Arriving after dark → Plan to arrive by 4pm at the latest.
- Not measuring your actual height → Include the A/C, antennas, and solar panels. Write it down.
- Booking a back-in site as a beginner → Filter for pull-through sites on your first trips.
- Not downloading offline maps → Cell service disappears exactly when you most need navigation.
- Overpacking the first trip → Start lean. You’ll discover on trip 1 what you actually use.
Frequently Asked Questions
How far in advance should I plan an RV trip?
For popular summer destinations near National Parks, book 3–6 months out. Snowbird destinations in Florida, Arizona, or Texas: 6–12 months. Regular RV parks: 2–4 weeks. Boondocking on BLM land needs no reservation.
What is the best app for planning an RV route?
RV LIFE Trip Wizard is the only mainstream app that accounts for your rig’s height, weight, length, and propane status when routing.
How do I find free camping for my RV?
BLM land allows free dispersed camping up to 14 days — concentrated in the western US. Use Campendium, The Dyrt Pro, or FreeCampsites.net to find specific spots.
Do I need a special license to drive an RV?
In most US states, a standard Class C driver’s license covers most motorhomes and towable RVs. Check your specific state’s DMV requirements before your first trip.
How much does an average RV trip cost per night?
Full hookup: $40–$80/night. Partial hookup: $25–$50/night. Dry camping: $10–$25/night. BLM boondocking: free.
How do I handle propane restrictions in tunnels?
Turn off propane at the tank valve before any tunnel crossing. RV LIFE Trip Wizard flags propane-restricted tunnels in your route automatically.
Keep Reading
- RV LIFE Trip Wizard Review 2026 — our full review of the #1 RV routing tool
- Best RV Trip Planner Apps — every app compared side by side
- How to Plan Your Snowbird RV Route — Florida, Texas, and Arizona for winter travel
Disclosure: This article contains affiliate links. If you subscribe to RV LIFE Trip Wizard through our link, we earn a commission at no extra cost to you. We only recommend tools we use and trust.

Published on June 14, 2026
Mike Dawson
Mike Dawson is RVGeo's lead editor, applying inspection-grade rigor to RV research - verifying manufacturer specs, testing components, and fact-checking pricing and claims before they're published. RVGeo's approach draws on a background in automotive technical inspection, applied specifically to RV electrical, power, and safety systems. Mike oversees RVGeo's foundational guides on power systems, DIY conversions, and van-life setup, with every recommendation checked against real specs and current pricing rather than assumptions.
This post contains affiliate links. If you make a purchase through these links, we may earn a commission at no extra cost to you.