
Author
By Mike Dawson
RVGeo Lead Editor | Inspection Expertise by Mohamed Najib, Certified Automotive Technical Inspector — 19 years of vehicle inspection experience
Most people buy a used RV the way they’d buy a used car: they look at the engine, the body, the mileage, and the price. Then, a season later, they get hit with a repair bill that has nothing to do with the engine.
Here’s what 19 years of vehicle inspection taught me: an RV is two machines in one — a vehicle and a house. And on a used RV, the majority of expensive repairs don’t come from the drivetrain. They come from the “house” side: water intrusion, the propane system, and a tired electrical setup. Those are exactly the things buyers skip.
This is the checklist I’d run before handing over any money — ordered by what actually costs you the most. Bring it with you. Better yet, bring a few cheap tools (I’ll list them at the end) and check as you go.
Start With the One Thing That Can’t Be Fixed: Water & Structure
If you only have time for one section, make it this one. A failed fridge is a part you replace. Water intrusion rots the structure — the internal wood framing, the plywood floor, the composite walls — and once that’s gone, the rig is often worth less than the repair. This is the single biggest value-killer on a used RV, and it hides.
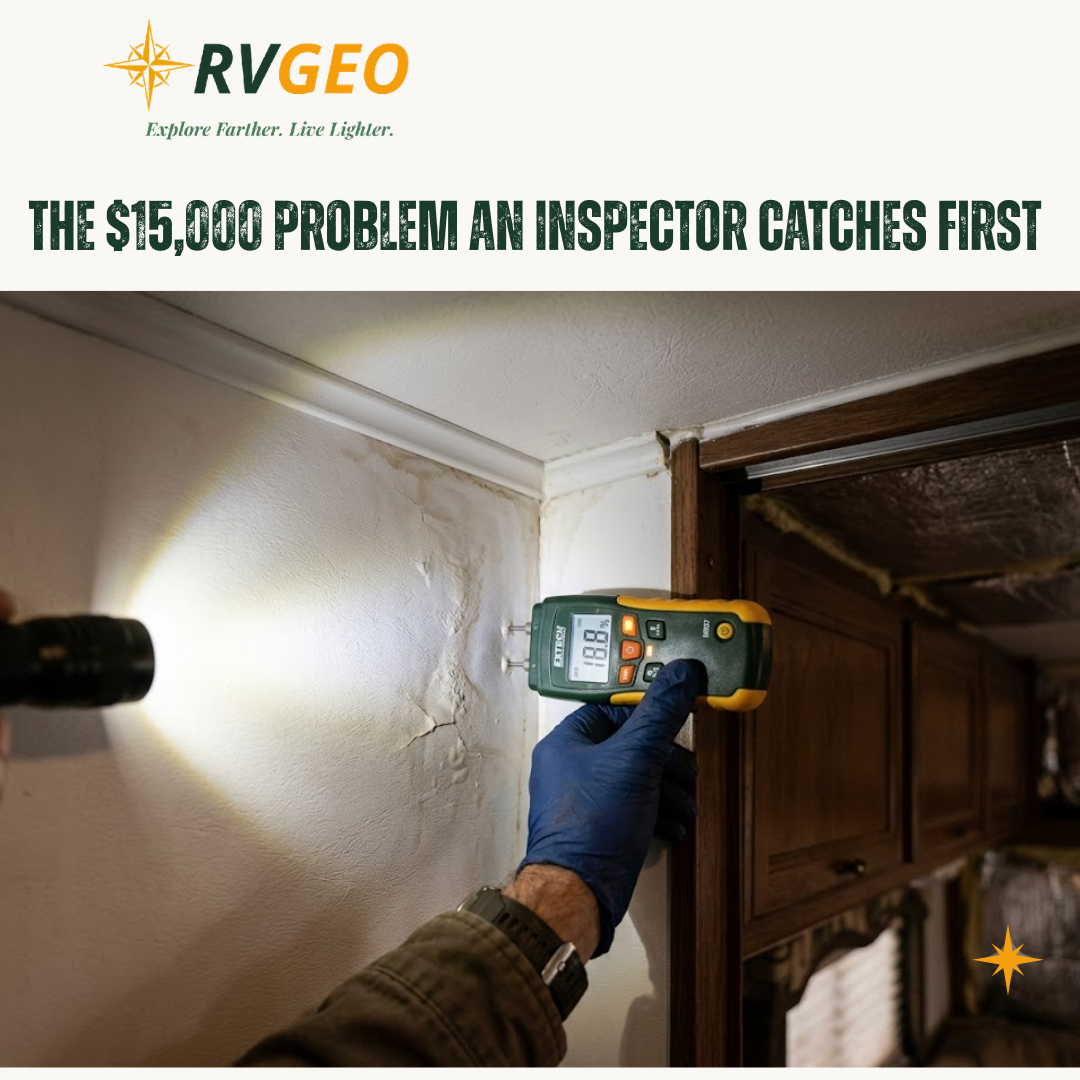
Water travels by capillary action and rots the internal wood framing long before the wall ever bulges. Your eyes alone won’t catch it. Here’s how to actually find it:
Use a moisture meter — and know the numbers. A pin-type moisture meter costs very little and is the most useful tool you can bring. Set it to “wood/building materials” and press the pins into the critical zones: under window seals, along the roof vents and skylights, at the base of the entry door, and in all four corners of the floor.
Read it like an inspector:
– Under 12–15% — normal, dry coach.
– Over 20% — active water retention. Something is getting in.
– Over 28–30% — the internal wood is already decomposing. Walk away, or price in a major repair.
The thumb test. Run firm thumb pressure down the walls, top to bottom. A proper sandwich wall (fiberglass / insulation / wood) should feel rigid. If your thumb sinks slightly, or you feel a “spongy” or springy give, the internal framing behind it is rotten.
Look underneath. Slide under the rig with a flashlight and inspect the plywood floor edges. If they crumble when you scratch lightly with a screwdriver, or the black sealant paint is blistering, water is running down from the roof inside the wall and pooling at the bottom. That’s a serious finding.
Trust your nose and eyes, too. A musty smell when you open the overhead cabinets, discoloration on the walls, or a soft spot underfoot are all late-stage tells — the damage has been spreading for months by the time you can see or smell it.
Check the roof seals. Most water gets in through failed sealant around roof vents, skylights, and the solar panel mounts. The sealant should be intact — not dry, cracked, or missing.
→ This is the same principle behind the biggest ownership cost of all: The RV Buying & Ownership Decisions That Save You Thousands.
The Coach Electrical System (12V DC + 120V AC)
The chassis wiring is factory. The coach electrical system — the part that powers your living space — is where previous owners “improvise,” and where you find the messy DIY jobs.
- The house battery. Check its age, its type (flooded lead-acid, AGM, gel, or lithium), and its resting voltage. Then load-test it (see the warning sign below).
- Solar panel & charge controller. With the panel in sun, check the controller display — is it actually showing voltage and charging current?
- The control panel. Test every circuit: LED lighting, water pump, fridge.
- 120V AC shore power. Plug the rig into a shore outlet and confirm the onboard converter/charger works and the interior outlets actually deliver power. (Remember: North American RVs run on 120V AC, 30- or 50-amp shore power — not 240V.)
The Fresh Water & Plumbing System
A pressurized water line that isn’t sealed causes invisible damage under the cabinets.
- Pressure-test the pump. Put a little fresh water in the tank and switch on the 12V pump. If the pump kicks on by itself while every faucet is closed, there’s a leak somewhere in the pressurized line.
- Water heater. Fire it up and confirm it heats without throwing an error code.
- Holding tanks. Check the gray-tank dump valve, and the black-tank seal and cleanliness. (On a compact camper van you may find a cassette toilet instead of a black holding tank — check the cassette seal the same way.)
Propane (LP Gas) & Heating — This Is a Safety System
Get this one wrong and it’s not just money. Treat it as life-safety.
- Hose and cylinder/tank dates. Check the LP gas hoses and regulator for age and cracking. Then check the propane supply — and know which type you have, because the rules differ. On a travel trailer, the removable DOT cylinders must be requalified 12 years from their manufacture date, then every 5 years after that; an out-of-date cylinder can’t legally be refilled. On a motorhome, the permanently-mounted ASME tank needs no recertification at all — but still inspect it for corrosion and leaks.
- Cylinder mounting. Confirm the securing straps are there and the regulator and safety shutoff work.
- Test everything under load. Light all the stove burners at once. Fire up the furnace: a gas furnace (Suburban and Atwood/Dometic are the common U.S. units; Truma is the newer premium option) should start from cold and put out steady heat. A diesel heater (Webasto, Espar) should fire without a suspicious smell or heavy smoke outside.
The Refrigerator (3-Way Absorption)
The RV fridge is one of the most expensive things to replace — a full absorption unit commonly runs $1,500–$2,500+ plus freight (swapping just the cooling unit can cost less). It also fails quietly, so test it deliberately.
- Ask the seller to turn it on a few hours before you arrive — a 3-way absorption fridge (Dometic, Norcold) takes a long time to cool, and “it just needs time” is the oldest cover story in the book.
- Test all three power sources (LP gas, 12V, 120V).
- The tell most buyers miss: on gas, the flame should be a clean blue. If it’s yellow or orange — or you hear a faint water “gurgling” from the back after 30 minutes — the cooling unit (the ammonia/water mixture) is crystallizing or the burner is fouled. That’s a fridge on its way out.
The 4 Systems That Fail Most — and the Quiet Sign for Each
Across the RVs I’ve inspected, four systems account for most of the “surprise” repair bills. Each one gives a subtle warning before it dies. Learn these four tells and you’ll spot trouble the seller may not even know about:
| System | Why it fails | The quiet sign that gives it away |
|---|---|---|
| 3-way refrigerator | Cooling unit crystallizes or gas burner fouls | Yellow/orange pilot flame instead of clean blue, or a water “gurgle” from the back after ~30 min |
| Water pump | Worn diaphragm, freeze damage, or a micro-leak in the pressurized line | Pump clicks on for ~1 second every 15–20 minutes with all faucets closed (pressure is bleeding off somewhere) |
| Furnace / water heater (Suburban, Atwood, Truma, Webasto) | Fouled ignitor, tired temp/limit sensor, stuck valve | Gas: repeated ignitor clicking that ends in a lockout (red light). Diesel: thick white/gray smoke underneath for the first 3 minutes (carboned combustion chamber) |
| House battery / charger | Deep-discharged from disuse or bad winter storage | Reads 12.7V at rest but collapses below 11.8V the moment you switch on 2–3 LED lights or the pump (capacity is gone — sulfated) |
Exterior & Openings
- Awning. Roll it all the way out — check for tears, sticky/degraded fabric, or a frame bent by wind.
- Roof vents & windows. Test the opening mechanisms and stays, the rubber seals, and that the blackout shades and bug screens actually work.
- Entry step. Confirm a powered step deploys and retracts, and that the dash buzzer sounds if it’s left out.
Chassis, Tires & Weight
An RV often rides near its weight limit, which wears certain parts early.
- Tires — age over tread. RV tires usually die of age, not mileage. Check the DOT date code and be wary of anything over 5–7 years old, even if the tread looks fine — look for sidewall cracking from sitting parked. Confirm the tires carry the right load rating for the rig.
- Air suspension (if equipped). Look and listen for air leaks in the bags.
- Weight & payload. This matters more than buyers think: previous owners’ add-ons eat into the legal margin fast. Check the GVWR and cargo carrying capacity on the federal weight sticker, and if you can, weigh the rig on a CAT Scale to see what’s really left.
Your Buyer’s Tool Kit
You don’t need a shop. These few tools turn a guess into a real inspection — and most cost less than a tank of fuel:
As an Amazon Associate, RVGeo earns from qualifying purchases — at no extra cost to you.
- Moisture meter (pin-type is fine) — the single most valuable tool here.
- Multimeter — voltage and fuse/continuity checks.
- DC clamp meter — reads current draw without cutting a wire.
- Battery load tester — measures real capacity vs. factory spec.
- LP leak-detector spray — bubbles up at any gas connection that leaks.
- Optional but powerful: a thermal camera (hidden water shows as a cold patch) and a water pressure gauge (PSI).
Want the full breakdown of each tool — how it works and which model to buy? See our best RV inspection tools guide.
When to Walk Away — and When to Call a Pro
Some findings are negotiating points; some are exits.
- Walk away (or price in thousands): moisture readings over 28–30%, spongy walls, crumbling floor edges — confirmed structural rot. This is the one that isn’t worth fixing.
- Call a professional inspector before you sign if the rig is otherwise promising but you can’t fully check the propane system, the chassis, or you get borderline moisture readings. A few hundred dollars of inspection is cheap insurance against a five-figure mistake. You can find a certified inspector through the NRVIA.
Everything else — a tired battery, a fussy fridge, a torn awning — is a reason to negotiate, not necessarily to run.
Run this list, in this order, and you’ll catch the problems that turn a “great deal” into a money pit — the same ones most buyers only discover after the check clears.
Next: see how this fits the bigger picture in The RV Buying & Ownership Decisions That Save You Thousands, and why reliability beats a cheap purchase price every time.
The engineering that makes a vehicle worth inspecting in the first place — parts availability and serviceability far from a dealer — is a subject RVGeo founder Mohamed Najib, a certified automotive technical inspector, was cited on by Observer. See our press and media mentions.

Published on July 21, 2026
Mike Dawson
Mike Dawson is RVGeo's lead editor, applying inspection-grade rigor to RV research - verifying manufacturer specs, testing components, and fact-checking pricing and claims before they're published. RVGeo's approach draws on a background in automotive technical inspection, applied specifically to RV electrical, power, and safety systems. Mike oversees RVGeo's foundational guides on power systems, DIY conversions, and van-life setup, with every recommendation checked against real specs and current pricing rather than assumptions.
This post contains affiliate links. If you make a purchase through these links, we may earn a commission at no extra cost to you.