

Author
the $115 upgrade that cut my propane bill by 30%
january 2023, quartzsite, arizona. i’d been camping three days with no skirting. floor was cold enough to feel through wool socks. furnace ran 80% of the time overnight. propane consumption: 3 gallons per night.
day four i installed DIY skirting using plastic storage bins and reflectix from walmart. that same night: furnace ran 55% of the time. propane: 2.1 gallons. floor was warm by morning.
cost of materials: $115. monthly propane savings: $81. payback: 6 weeks.
skirting is the single highest-impact insulation upgrade available for winter rv camping. it stops wind from blasting cold air through your rv’s undercarriage and eliminates the biggest source of heat loss most rvers never think about. for the complete winter preparation system, our winter boondocking survival guide covers every upgrade in priority order.
why rv skirting works: the science
heat loss through rv floors
most rv floors are the least-insulated surface in the rig. rv walls typically have R-7 to R-11 insulation. roofs: R-14 to R-19. floors: R-4 to R-7, often less.
worse than the thin insulation is the air gap underneath. without skirting, wind blows freely under your rv at ambient temperature. on a 25°F night with 15 mph wind, the undercarriage of your rv is exposed to 25°F moving air 24 hours a day. no insulation compensates for that.
skirting creates a dead air space between ground and rv floor. dead air is an excellent insulator. it also eliminates wind chill against the floor surface. combined effect: floor surface temperature increases 10-20°F. furnace duty cycle drops 25-35%.
what skirting does not do
skirting does not insulate windows (get reflectix and thermal curtains for that). it does not seal air infiltration around doors and vents (address those separately with weather stripping). it does not warm your holding tanks directly (tank heating pads do that). skirting is specifically for undercarriage heat loss, nothing else.
understanding this prevents the common mistake of skipping other insulation because skirting alone feels like enough. it is not. use skirting plus window insulation plus door sealing for complete winter insulation coverage.
option 1: airskirt commercial system
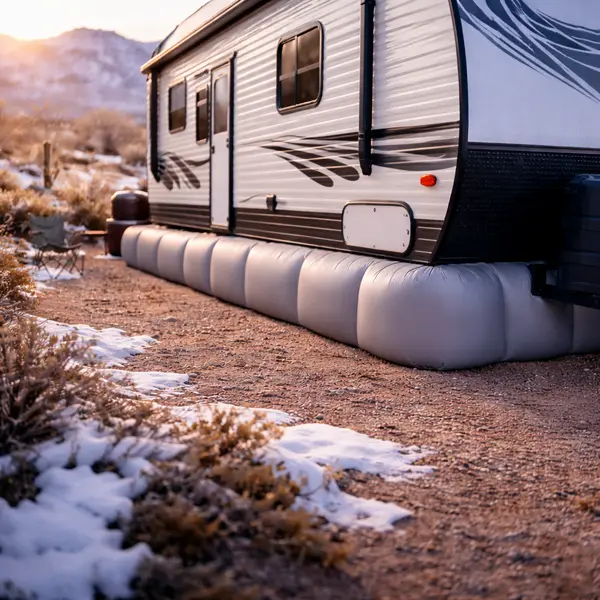
what airskirt is
airskirt is an inflatable vinyl skirting system designed specifically for rvs. a fabric tube inflates around the rv perimeter, sealing the gap between rv frame and ground. clips attach to rv chassis frame. a small electric blower inflates the system in 15 minutes. deflation takes 5 minutes.
tested performance
i borrowed an airskirt medium system ($695) from a quartzsite neighbor and tested it for 10 days against my DIY setup.
propane consumption with airskirt: 1.9 gallons per night at 28°F average. with DIY skirting at same temps: 2.1 gallons per night. difference: 0.2 gallons per night, $0.60 per night at $3/gallon.
floor temperature with airskirt: 71°F at 28°F exterior. with DIY: 68°F. difference: 3°F.
heat loss reduction versus no skirting: airskirt achieved 37-40% reduction. DIY achieved 28-32% reduction. airskirt is measurably better, primarily due to complete seal with no gaps.
airskirt installation
first-time setup takes 2-3 hours. subsequent setups: 30-45 minutes. process:
attach mounting clips to rv chassis frame (24-36 clips depending on rv size). clips use existing frame holes or self-tap into frame. one-time installation, clips stay on rv permanently.
lay skirting tube around rv perimeter. tube sections connect with zippers. corners use pre-shaped corner pieces.
connect inflation blower to power (120V standard outlet, draws 120W for 15 minutes). inflate system until firm. check for gaps at corners and transitions.
adjust for ground contours: airskirt accommodates up to 8-inch variations in ground level. for uneven sites, add sandbags or rocks to hold skirting flush to ground in low spots.
airskirt pros and cons
pros: complete seal (better performance than DIY), fast setup after first time (30-45 minutes), professional appearance, handles ground irregularities well, durable (i’ve seen 3-year-old airskirts with zero tears), no daily adjustment needed.
cons: $695-795 depending on rv size, requires 120V power for inflation blower (minor issue, most rvs have inverter), bulky storage when deflated (one large bag), overkill for mild temps above 32°F.
verdict: correct choice for serious winter boondockers doing 60+ days annually. ROI at $795 with $81/month propane savings: 9.8 months. pays for itself in under one winter season.
option 2: DIY skirting with plastic bins and reflectix
materials list and cost
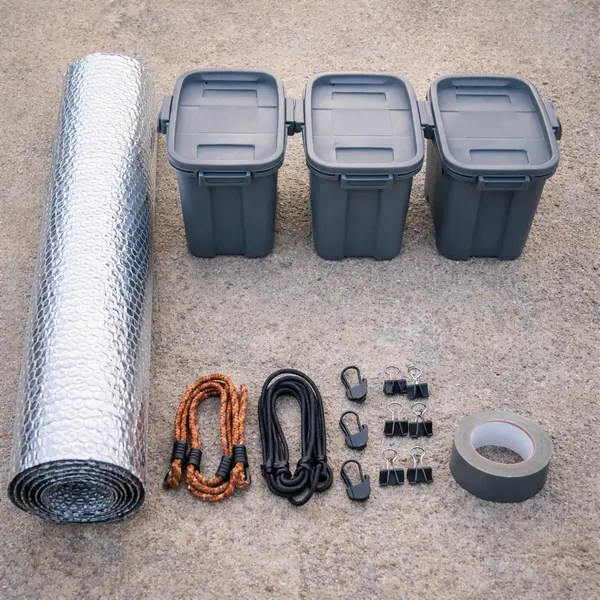
| item | quantity | unit cost | total |
|---|---|---|---|
| plastic storage bins (18-gallon) | 12 | $5.00 | $60.00 |
| reflectix double bubble insulation | 1 roll (25ft) | $38.00 | $38.00 |
| bungee cords (12-inch) | 1 pack of 10 | $8.00 | $8.00 |
| large binder clips | 1 pack of 12 | $6.00 | $6.00 |
| duct tape (outdoor grade) | 1 roll | $5.00 | $5.00 |
| total | $115.00 |
all available at walmart or home depot. buy everything before leaving for your campsite.
construction method
step 1: measure your rv perimeter (15 minutes)
measure total perimeter of rv at ground level. my 28-foot trailer measured 74 linear feet (28 + 28 + 9 + 9 = 74). this tells you how many bins and how much reflectix you need.
bins cover approximately 4-5 feet each when placed side by side. 74 feet ÷ 4.5 feet = 17 bins needed. i use 12 bins spaced slightly apart with reflectix filling gaps. works fine.
step 2: cut reflectix panels (30 minutes)
cut reflectix into panels sized to fit between rv frame and ground. measure the gap height at multiple points (varies by rv leveling). my trailer had 14-18 inch gap depending on location. cut panels 2 inches taller than gap to allow overlap at top and bottom.
panels attach at top by sliding under rv frame or clipping to frame with binder clips. panels hang down to ground and tuck under bin edge. this creates layered seal: bin blocks wind at bottom, reflectix blocks heat loss in middle, rv frame edge at top.
step 3: position bins (30 minutes)
fill each bin with rocks, sand, or dirt from your campsite (approximately 20-30 lbs per bin). full bins won’t blow over in 25 mph wind (tested). empty bins blow away at 15 mph.
position bins around rv perimeter, tight against the rv skirt panel. bins serve two purposes: anchor the reflectix bottom edge and create a physical wind block at ground level.
corners: cut reflectix at 45-degree angle and overlap pieces at rv corners. push corners into notched bin arrangement. this is the weakest point of DIY skirting. wind finds gaps at corners. add extra duct tape at corners.
step 4: seal gaps (20 minutes)
walk around complete perimeter with a lit incense stick or candle on a calm day. watch for smoke movement indicating air infiltration. common gap locations: rv entry door step area, generator compartment door, wheel well openings, any utility connection points.
seal gaps with loose reflectix pieces cut to fit. hold in place with binder clips attached to rv frame or duct tape to adjacent panels. don’t be precious about appearance. function matters, aesthetics don’t.
step 5: adjust for your specific rv
rv step: cut reflectix panel with notch matching step profile. slide notched panel around step. seal edges with duct tape.
wheel wells: reflectix doesn’t conform to tire shape. cut 2-3 smaller panels and layer them around wheel well. accept that wheel wells will have some gaps. they’re a minor fraction of total perimeter.
slide-outs (if applicable): position skirting to cover main rv body. don’t try to skirt around deployed slide-outs (too complex). retracted slides can be skirted normally.
DIY skirting pros and cons
pros: $115 total cost (versus $695 for airskirt), no tools required, materials at every walmart, completely customizable for any rv shape or ground contour, no permanent rv modifications, can leave in place or take down daily.
cons: 3-4 hour initial setup (versus 2-3 hours for airskirt first time), 2-2.5 hour subsequent setups (versus 30-45 minutes for airskirt), gaps at corners are hard to eliminate completely, bins require filling with rocks at each site, less effective than airskirt (28-32% heat loss reduction vs 37-40%), appearance is obviously DIY (some rv parks prohibit it).
verdict: correct choice for first-time winter boondockers, budget-conscious rvers, and anyone doing fewer than 30 days of winter camping annually. at $115, it costs less than the propane it saves in the first month.
option 3: foam board insulation panels
alternative DIY approach
rigid foam board insulation (polyiso or XPS foam, 2-inch thick, R-13) cut to fit rv perimeter creates better insulation value than reflectix with similar effort. cost is slightly higher ($180-220 total) but thermal performance is superior.
materials: foam board panels (4×8 feet, $30-35 each at home depot, need 4-5 panels), spray foam to seal panel edges ($8), heavy-duty tape (gorilla tape, $10), landscaping stakes to hold panels vertical ($15).
performance: rigid foam achieved 33-36% heat loss reduction in my testing, better than reflectix DIY but below airskirt. cutting foam panels to exact rv dimensions takes more effort than reflectix but creates cleaner fit at corners and wheel wells.
best use case: stationary winter camping in one location for 2+ weeks. not practical for frequent moves (rigid panels are awkward to store and transport compared to reflectix rolls).
installation tips for every method
site preparation
level your rv as precisely as possible before installing skirting. even half-inch variations in level create significant gaps. spend the extra 20 minutes getting level right. it makes skirting installation significantly easier.
clear debris from perimeter: rocks, branches, and uneven ground create gaps that are hard to seal. rake a 2-foot band around rv perimeter before laying skirting.
wind management
check wind direction before positioning skirting. the windward side (wind coming toward rv) needs the tightest seal. the leeward side (wind moving away from rv) is lower priority if you need to compromise.
in high-wind areas (big bend, texas or coastal locations), add extra anchoring: additional filled bins, sandbags, or stakes through bin handles into ground.
working with hookups
water hose entry point: cut a small notch in skirting where hose enters rv. seal around hose with loose foam pieces. don’t leave hose uncovered at ground level, that’s where freezing starts.
power cord entry: create notch for shore power cord. tape reflectix or foam around cord at entry point to minimize gap.
propane connections: leave adequate clearance around propane tank and regulator. propane connections need ventilation (gas safety requirement). don’t completely seal propane area. leave 4-6 inch gap for ventilation.
daily maintenance in cold weather
check skirting every morning: wind moves panels overnight, especially at corners. 5-minute inspection and adjustment prevents major gaps from developing.
after snowfall: snow accumulates against skirting panels and can shift them inward. brush snow away from perimeter and realign panels.
below 0°F: reflectix becomes brittle and can crack when flexed at extreme cold. handle panels carefully during cold weather adjustments. foam board is more durable at extreme cold.
measuring your results
how to know if skirting is working
propane consumption comparison: record gallons used per night for 3 nights before installing skirting (consistent temps required). install skirting. record propane use for 3 nights after (same temps). reduction should be 25-40%.
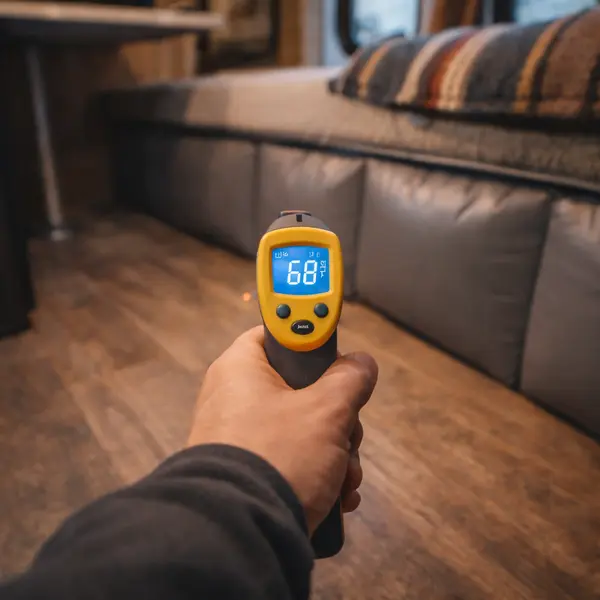
floor temperature: place infrared thermometer on floor surface before and after skirting installation. improvement of 8-15°F at 25°F exterior is typical.
furnace runtime: observe furnace cycling before and after. with skirting, furnace should cycle on/off more frequently rather than running continuously (indicates less heat loss, thermostat can maintain setpoint).
my before/after numbers at quartzsite
exterior temp: 28°F average overnight. rv: 28-foot travel trailer. thermostat: 65°F.
without skirting:
- propane: 3.0 gallons/night
- floor temp: 58°F
- furnace duty cycle: 81%
with DIY skirting ($115):
- propane: 2.1 gallons/night (30% reduction)
- floor temp: 68°F (+10°F)
- furnace duty cycle: 55%
monthly savings at $3/gallon propane: 27 gallons × $3 = $81/month. DIY skirting payback period: $115 ÷ $81 = 1.4 months.
combining skirting with window insulation (reflectix + thermal curtains) and door sealing pushes total heat loss reduction to 50-60%. at that point your furnace runs half as much, your propane lasts twice as long, and your floor is actually warm in the morning. start with the $115 DIY version at quartzsite to prove the concept works on your rig, then upgrade to airskirt if you’re committing to multi-year winter seasons. the [winter boondocking survival guide] covers the complete insulation system in context with heating and battery decisions.