
Author
Why maintenance matters more than the filter itself
Three years into full-time RVing, I got lazy. I’d been using the same inline filter for six months without replacement. it still allowed water to flow, so I figured it was fine.
Then my family got sick. stomach issues, headaches, fatigue. we eventually traced it back to our filter, which lab testing revealed was harboring bacteria. the carbon had become saturated months earlier and stopped filtering anything. worse, it had become a breeding ground for the exact contaminants we were trying to avoid.
That expensive lesson taught me: a poorly maintained filter is worse than no filter at all. it gives you false confidence while actually making water less safe.
In this guide, I’m sharing everything I’ve learned about filter maintenance over eight years and 100+ campgrounds. you’ll learn exactly when to replace filters, how to winterize them properly, what warning signs mean it’s time for immediate replacement, and how to extend filter life without compromising safety.
Proper maintenance isn’t complicated or expensive. it just requires attention and consistency.
if you’re unsure which system you have, consult our complete guide to rv water filtration systems for identification.
understanding filter lifespan: time vs. usage
Filter manufacturers give two specifications: time-based (months) and usage-based (gallons). both matter, but usage matters more.
capacity ratings explained
typical inline filter capacities:
- basic filters: 500 gallons or 2-3 months
- standard filters: 1,000 gallons or 3-4 months
- premium filters: 2,000 gallons or 4-6 months
typical canister filter capacities:
- sediment cartridge: 2,000-5,000 gallons or 3-6 months
- carbon cartridge: 5,000-10,000 gallons or 6-12 months
- specialty cartridge: varies by type
why time matters even if you haven’t hit gallon limit:
carbon filters absorb contaminants through chemical process. once carbon pores are saturated, filter stops working even if you haven’t reached gallon rating. time-based replacement accounts for:
- bacterial growth in stagnant water
- carbon degradation from air exposure
- chlorine continuing to react with carbon even when not flowing
how to track your usage
method 1: estimate based on travel frequency
weekend warriors (30-50 nights/year):
- estimate 50 gallons per weekend
- 40 weekends = 2,000 gallons per season
- replace 2,000-gallon filter once per season
full-timers (365 days/year):
- estimate 30-50 gallons daily
- 90 days = 2,700-4,500 gallons
- replace 2,000-gallon filter every 60-75 days
method 2: install inline water meter
I use a simple inline water meter ($25 on amazon) between my filter and hose. it tracks exact gallons used. when meter reaches filter capacity, I replace filter and reset meter. takes all guesswork out.
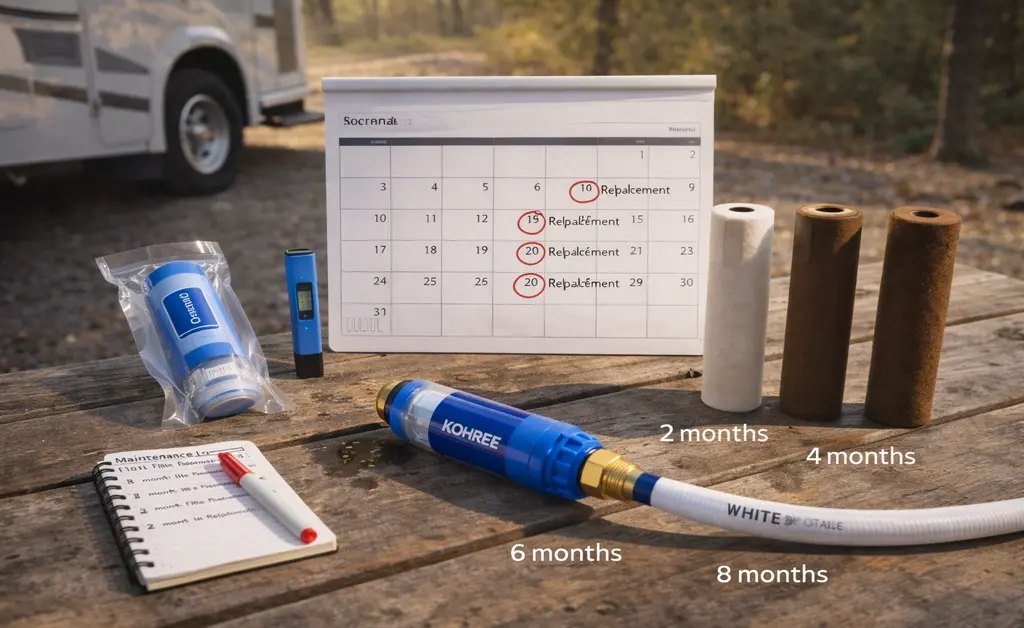
method 3: mark calendar replacement dates
simplest method: mark filter installation date with permanent marker on filter body. set phone reminder for replacement date based on time rating. replace on schedule regardless of usage.
I use this method. my phone reminds me every 90 days: “replace kohree filter.” I check calendar, buy replacement, swap it out.
replacement schedule by filter type
inline filters
weekend/occasional rvers (30-50 nights/year):
- replace every season (3-4 months)
- mark installation date in spring
- replace again before winterization
extended travelers (60-150 nights/year):
- replace every 2-3 months
- set quarterly reminders
- inspect monthly for visible issues
full-timers (200+ nights/year):
- replace every 4-8 weeks depending on capacity rating
- inspect weekly
- keep 2-3 spare filters in stock
my personal schedule: I use kohree 2,000-gallon filters. as full-timer, I replace every 75 days. I’ve tested this extensively and know carbon is spent by day 90, so 75 days gives safety margin.
choosing quality filters extends lifespan and performance. we’ve tested 8 models to find the best. see our tested inline rv water filters for recommendations
under-sink canister systems
these have multiple stages, each with different lifespan:
stage 1 (sediment pre-filter):
- replace every 3-6 months
- this stage catches most junk, protecting other stages
- inspect monthly through clear housing
- replace when dark brown or pressure drops
stage 2 (carbon block):
- replace every 6-12 months
- cannot see saturation, must replace on schedule
- handles chemical filtration after sediment removed
hard water damages filters and plumbing faster than contamination. if you travel in southwest or florida, read our water softener maintenance guide.
stage 3 (specialty filter):
- follow manufacturer guidelines
- typically 9-12 months
- KDF media lasts longer than carbon
pro tip: replace all stages at same time annually. easier to remember, ensures entire system fresh. yes, you might replace stage 3 earlier than necessary, but peace of mind worth the extra $20.
external multi-stage systems
similar to under-sink but larger capacity:
stage 1 sediment:
- every 4-6 months full-timing
- every 6-12 months part-timing
stage 2 carbon:
- every 6-9 months full-timing
- every 12-18 months part-timing
stage 3 specialty:
- every 9-12 months full-timing
- every 18-24 months part-timing
my clearsource premier: I replace stage 1 every 5 months, stage 2 every 8 months. I mark replacement dates in phone calendar and buy cartridges in advance.
warning signs: replace immediately
don’t wait for scheduled replacement if you notice these:
pressure drop: if shower pressure decreases noticeably, filter is clogged. sediment has blocked pores. replace immediately even if installation was recent.
taste degradation: when chlorine taste returns, carbon is saturated. filter no longer removing chemicals. replace now.
visible sediment: if you see particles in water after filter, either filter overwhelmed or you’re filtering water too dirty for that filter type. upgrade to finer micron rating.
odor returns: sulfur smell, musty smell, or any unpleasant odor means filter exhausted. don’t ignore this.
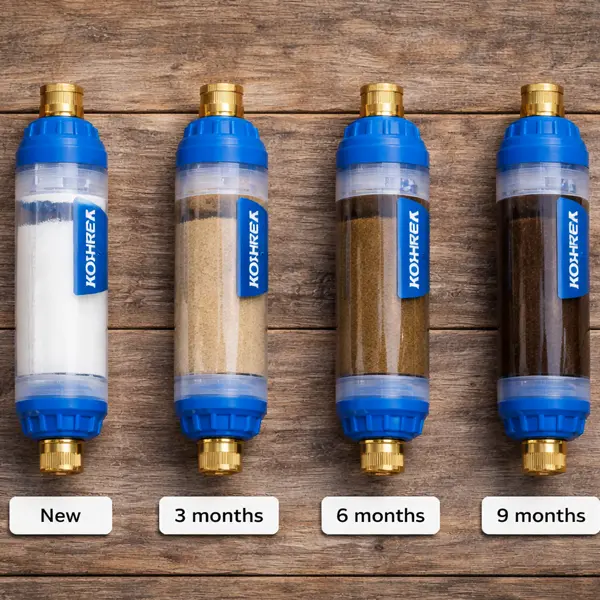
dark cartridge color: if housing is clear and cartridge looks very dark brown/black, it’s saturated with sediment. time to replace.
illness after water consumption: if you or family experience stomach issues after drinking filtered water, replace filter immediately and sanitize rv fresh water tank.
filter older than 6 months: even if it seems fine, carbon loses effectiveness after 6 months of air exposure. replace any filter over 6 months old regardless of usage.
how to replace filters (step by step)
replacing inline filters
time required: 2 minutes
difficulty: easy
steps:
- turn off campground spigot
- release pressure (open rv faucet briefly)
- unscrew old filter from connections
- check rubber washers in both ends (replace if worn)
- screw new filter into place (check arrow direction)
- turn on spigot slowly
- check for leaks
- flush 2-3 minutes inside rv
disposal: old carbon filters go in regular trash. carbon is not hazardous.
replacing canister cartridges
time required: 10-15 minutes
difficulty: easy-medium
note: have towels ready, water will spill
steps:
- turn off inlet valve
- release pressure (open faucet)
- place bucket under canisters
- unscrew first canister (water will drain)
- remove old cartridge
- rinse canister housing with clean water
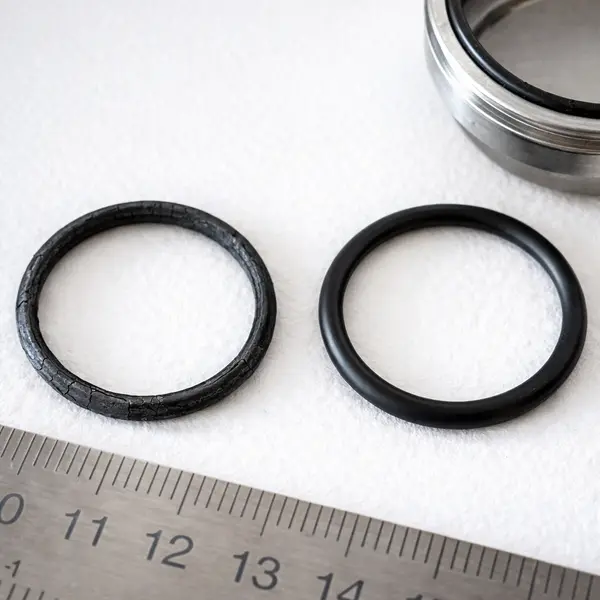
- check o-ring (rubber seal at top) – replace if cracked or flattened
- insert new cartridge
- hand-tighten canister back onto cap
- repeat for other stages
- turn on inlet valve slowly
- check for leaks
- flush system 5 minutes
common mistake: forgetting to replace o-rings. they compress over time and cause leaks. replace o-rings annually ($5 for set).
extending filter life without compromising safety
use sediment pre-filter: if camping at place with heavy sediment, add cheap 20-100 micron sediment filter before your expensive carbon filter. sediment filter catches junk, carbon filter lasts longer. sediment filters are $5-10 and disposable.
don’t filter when filling fresh tank: if you’re filling fresh tank for boondocking, don’t run water through your inline filter. you’ll use 50-100 gallons filling tank, burning through filter capacity fast. instead, use inline filter when connected to city water. fill tank directly without filter, then use separate filtration for drinking water from tank.
winterize properly: properly winterized filters can be reused next season. filters destroyed by freezing cannot. follow winterization steps religiously.
avoid ultra-dirty sources: if water is visibly brown or cloudy, your standard filter will clog immediately. either use pre-filter first, or consider if you should be using that water source at all.
rotate filters seasonally: I keep different filters for different situations. kohree for normal campgrounds. cheap rv guard for known-good water at luxury resorts. clear2o for florida sulfur water. this extends life of premium filters.
winterization: protecting filters from freeze damage
inline filters:
before first freeze (35°f or lower):
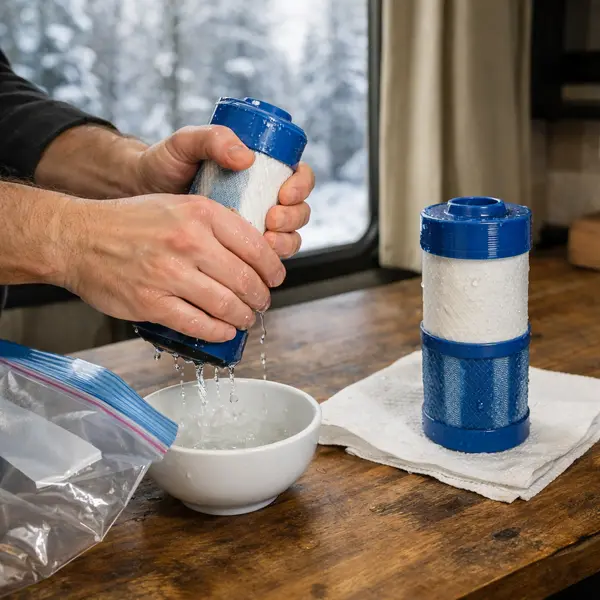
- disconnect filter completely
- shake out ALL water
- blow through filter to remove remaining water
- bring indoors to heated space
- store in sealed plastic bag
why this matters: water expands when frozen. even small amount of water will crack plastic housing. cracked housing cannot be used even if cartridge undamaged.
spring reinstallation:
- inspect housing for any cracks
- check threads for damage
- install fresh cartridge (don’t reuse old)
- reconnect and flush 3 minutes
under-sink and external systems:
winterization process:
- turn off inlet valve
- release all pressure
- open drain valves (if equipped)
- unscrew all canisters
- remove all cartridges
- drain canisters completely (shake out water)
- store cartridges indoors in sealed bags
- store o-rings with cartridges (prevents drying)
- leave empty canisters on brackets or remove if risk of freezing
alternative: keep system installed in heated space
if wet bay stays heated above 40°f all winter, you can leave system installed. but this is risky – if heater fails, entire system destroyed.
I remove cartridges even with heated wet bay. $60 for new cartridges is cheaper than $500 for new system.
sanitizing and deep cleaning
when to sanitize:
- after winterization (spring startup)
- after any illness from water
- after extended storage (1+ months)
- annually for prevention
reinstalling filters after winter? follow proper technique to prevent leaks. our installation guide covers every connection point
how to sanitize rv fresh water system (includes filter maintenance):
step 1: remove all filters and cartridges
step 2: prepare bleach solution
- 1/4 cup bleach per 15 gallons of tank capacity
- mix bleach with 1 gallon water first
step 3: pour solution into fresh tank
step 4: fill tank completely with fresh water
step 5: turn on water pump, open every faucet until you smell bleach
step 6: let sit 12 hours minimum (overnight ideal)
step 7: drain tank completely
step 8: refill with fresh water, drain completely (repeat 2-3 times until no bleach smell)
step 9: reinstall filters with fresh cartridges
step 10: flush filtered water 5 minutes before drinking
I do this every spring without fail. takes 24 hours total (mostly waiting) but ensures clean water system.
frequently asked questions
can I clean and reuse filter cartridges?
no. carbon filters cannot be cleaned. once saturated, they’re done. sediment pre-filters with pleated material can sometimes be rinsed, but I don’t recommend it. cartridges are cheap, your health is not.
how do I know if my filter is actually working?
use TDS meter ($15-30 on amazon). test water before and after filter. you should see measurable PPM reduction. if PPM is same before and after, filter is spent.
what if I can’t remember when I installed filter?
replace it now. going forward, mark installation date on filter with permanent marker. set phone reminder for replacement. problem solved.
do I need to replace pressure regulator?
pressure regulators rarely need replacement. check gauge – if it shows pressure between 40-60 PSI when connected, it’s working. if gauge broken or pressure seems wrong, replace ($30-50).
can I store filters long-term?
unopened filters in sealed packaging: 2-3 years shelf life. opened/used filters: use within 6 months or carbon degrades. don’t store “partially used” filters over winter – replace with fresh in spring.
make it routine:
filter maintenance isn’t exciting. but neither is getting sick from contaminated water or replacing expensive rv plumbing damaged by sediment.
My routine:
- mark installation date on every filter
- set phone reminders for replacement
- keep 2 spare filters in rv storage
- inspect filters monthly during walkthrough
- replace on schedule without excuses
- winterize before first freeze
this routine takes maybe 10 minutes monthly plus 5 minutes every 2-3 months for replacement. that’s tiny investment for clean water and peace of mind.
make filter maintenance part of your rv routine like checking tire pressure or testing smoke detectors. your future self will thank you.