
Author
RV solar systems range from $2,000 budget builds to $12,000+ premium setups, but which investment matches your actual needs? This complete cost breakdown itemizes components, installation, and real-world expenses for three system sizes. We’ve included payback calculations comparing campground fees ($45-80/night) against system investment. Whether you’re a weekend warrior or full-timer, understanding these economics helps you design a practical off-grid power solution that balances capabilities with budget while avoiding both under-building and expensive overkill.
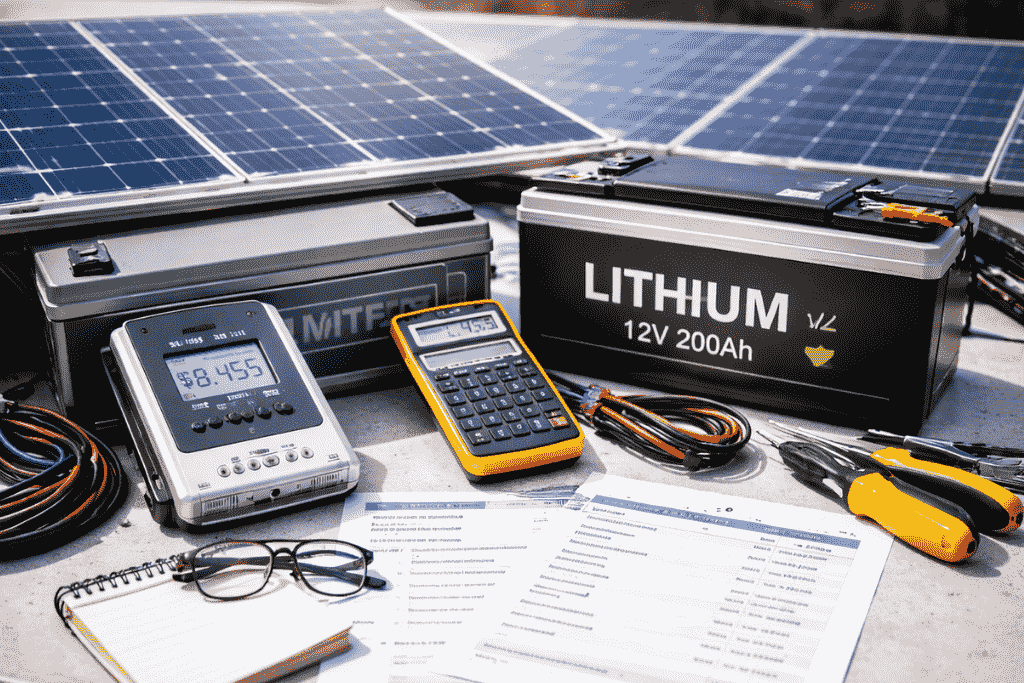
The True Cost Nobody Tells You Upfront
When I started researching solar, every forum post said “just budget $3,000 and you’re good.” That number meant nothing because nobody specified what $3,000 actually bought. Turns out, $3,000 can build vastly different systems depending on component choices, installation method, and whether you’re including batteries or adding to existing capacity.
My first system cost $4,200 all-in 400W panels, 200Ah lithium battery, quality MPPT controller, professional installation, and all necessary hardware. My neighbor built a similar 400W system for $2,100 by installing himself, choosing budget components, and already owning suitable batteries.
Both systems work, but mine delivers 15% more daily power and will likely outlast his by 5+ years. Was my extra $2,100 worth it? Depends entirely on your camping frequency, mechanical confidence, and tolerance for dealing with component failures.
Let’s break down real costs for three system sizes so you can make informed decisions instead of guessing based on forum posts.

Budget System: Weekend Warrior (200-300W)
Target user: Couples camping 20-40 nights annually, primarily summer, mix of hookup and boondock camping, modest power needs.
Core Components:
- 2× 100W solar panels (Renogy or similar): $200-$280
- 20A MPPT controller (EPEVER/Renogy): $80-$130
- 100Ah lithium battery (Ampere Time): $500-$650
- MC4 connectors and 10AWG wire: $60-$80
- Mounting hardware (Z-brackets): $40-$60
- Cable entry gland and sealant: $30-$40
- Breakers/fuses and terminal blocks: $40-$60
Total Components: $950-$1,300
DIY Installation:
- Tools (if not owned): $100-$200
- Time investment: 8-12 hours
- Total DIY: $1,050-$1,500
Professional Installation:
- Labor: $800-$1,200
- Total Professional: $1,750-$2,500
This system generates 600-900Wh daily in good conditions enough to run a 12V fridge, LED lights, charge phones and laptops, and operate a water pump. You won’t run fans continuously or power an inverter for heavy loads, but it covers basics for 2-3 days of boondocking before needing generator support.
Payback calculation: At 30 nights boondocking annually (avoiding $50/night campground fees), you save $1,500/year. DIY system pays for itself in under 1 year. Professional installation breaks even in 1.5-2 years.
My honest take? This is the minimum viable system for occasional boondocking. Any smaller and you’ll be frustrated by limitations requiring accurate solar panel sizing from the start.
Mid-Range System: Extended Travel (400-600W)
Target user: Couples or small families camping 60-100 nights annually, year-round travel, regular 5-7 day boondocking trips, work remotely occasionally.
Core Components:
- 4× 100W solar panels (Renogy): $400-$560
- 30-40A MPPT controller (Victron/Renogy): $170-$190
- 200Ah lithium battery (Renogy/RELiON): $900-$1,200
- MC4 connectors and 10AWG wire: $100-$140
- Aluminum mounting rails: $120-$180
- Cable entry gland and sealant: $40-$60
- Breakers/fuses, terminals, combiner box: $80-$120
- Battery monitoring (Victron BMV): $150-$180
Understanding lithium versus AGM economics helps justify the battery investment through long-term savings and superior performance
Total Components: $1,960-$2,630
DIY Installation:
- Tools (if not owned): $150-$250
- Time investment: 12-16 hours
- Total DIY: $2,110-$2,880
Professional Installation:
- Labor: $1,200-$1,800
- Total Professional: $3,160-$4,430
This system produces 1,200-2,000Wh daily depending on season and location. It’s the sweet spot for serious RVers enough capacity to run everything except AC for a week straight, with recovery capability even after cloudy days.
I run this exact configuration. It powers my fridge, two laptops working full-time, fans at night, LED lighting, water pump, and phone charging with battery reserves remaining. I’ve boondocked 14 days straight in decent sun without generator use.
Payback calculation: At 80 nights boondocking annually (avoiding $60/night fees), you save $4,800/year. DIY system pays for itself in 6 months. Professional installation breaks even in 9-12 months.
This is where most full-timers and serious boondockers should land. The capacity handles real-world usage with weather variability built in, and the quality components last 10+ years without replacement.
Premium System: Full-Time Boondocking (800-1000W)
Target user: Full-time RVers, families, remote workers, year-round camping in varied climates, 200+ nights annually boondocking, running high loads including occasional AC use.
Core Components:
- 8× 100W solar panels (Battle Born rated): $800-$1,120
- 60A MPPT controller (Victron): $290-$350
- 400Ah lithium battery (2× 200Ah Battle Born): $3,000-$3,200
- MC4 connectors and 8AWG wire: $180-$240
- Professional mounting system: $250-$350
- Cable entry glands and sealant: $60-$80
- Breakers, combiners, disconnect switches: $150-$200
- Battery monitor with shunt: $180-$220
- Installation accessories: $100-$150
Total Components: $5,010-$5,910
DIY Installation:
- Professional tools required: $200-$300
- Time investment: 20-30 hours
- Total DIY: $5,210-$6,210
Professional Installation:
- Labor (complex system): $2,000-$3,000
- Total Professional: $7,010-$8,910
This system generates 2,400-4,000Wh daily enough to run a residential fridge, multiple laptops, entertainment systems, lights, fans, and even microwave usage without worry. You can run a small AC unit for a few hours daily in shoulder seasons if you’re strategic about it.
for guidance on comprehensive power system design that integrates all components effectively for maximum reliability
Several full-time RVer friends run systems in this range. One family of four with two teenagers working/schooling remotely boondocks indefinitely in the Southwest, running their entire household off an 800W solar setup. They haven’t plugged in or run their generator in 8 months.
Payback calculation: At 200 nights boondocking annually (avoiding $65/night fees), you save $13,000/year. Even the professional installation breaks even in under 8 months. DIY pays for itself in 5 months.
The economics at this usage level are absurd. You’re essentially getting free electricity for 10+ years after a 6-month payback. The system pays for itself multiple times over.
Hidden Costs That Add Up
Every cost breakdown I’ve seen online omits the little expenses that add 10-20% to your final bill:
Permits and inspection: Some jurisdictions require electrical permits for solar installations. Most RVers ignore this, but if you’re modifying a financed RV, your lender might require permitted work. Budget $100-$300 if applicable.
Upgraded battery cables: If your existing battery cables aren’t adequate gauge for increased amperage, factor $80-$150 for replacement cables and terminals.
Backup generator maintenance: Even with solar, you’ll want a generator for extended cloudy periods. If yours is old or unreliable, budget $500-$1,500 for a quality portable unit.
Extended warranties: Premium components include good warranties, but budget items often don’t. Extended warranty coverage costs $100-$200 but provides peace of mind for expensive controllers and batteries.
Future expansion: If you might add capacity later, oversizing wire and buying a larger controller now costs $150-$250 extra but saves $500+ in replacement costs later.
Learning curve mistakes: I destroyed a $40 breaker by wiring it backwards. My friend cracked a $180 panel by overtightening mounting bolts. Budget $100-$200 for inevitable rookie errors if DIY installing.
My supposedly $4,200 system actually cost $4,680 when I included new battery cables ($120), upgraded breakers ($85), extra sealant after I ran out mid-install ($35), replacement connectors after botching the first crimps ($28), and the battery monitor I didn’t originally budget for but desperately wanted ($180).
DIY vs Professional: The Real Trade-Off
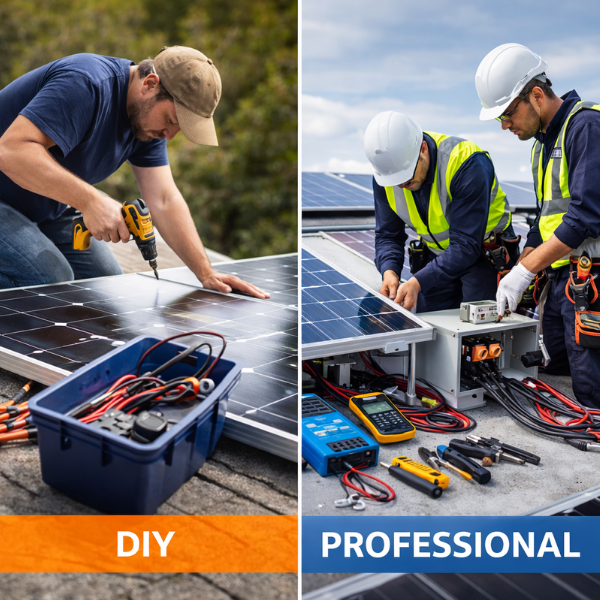
The labor cost difference ranges from $800-$3,000 depending on system complexity. That’s real money, but it’s not the only consideration.
DIY advantages:
- Save $800-$3,000 on labor
- Learn your system intimately for easier troubleshooting
- Ability to expand or modify without hiring help
- Pride of ownership and accomplishment
- Schedule work on your timeline
i’ve watched people build $8,000 systems that could have been $5,000 with smarter shopping and following step-by-step installation instructions for quality DIY results
DIY disadvantages:
- Risk of damaging components ($200-$500 typical mistakes)
- Potential roof leaks from improper sealing (expensive to fix)
- Time investment (16-30 hours for first system)
- Tool purchase if not owned ($150-$300)
- No warranty coverage if you make mistakes
- Stress and frustration learning curve
Professional advantages:
- Guaranteed leak-free installation
- Faster completion (typically 1-2 days)
- Warranty coverage on installation work
- Proper permitting and code compliance
- Zero personal time investment
- Professional-grade tools and techniques
Professional disadvantages:
- High labor costs ($800-$3,000)
- Less understanding of your system
- Scheduling delays (2-4 weeks typical wait)
- Potential upselling of unnecessary components
- Less flexibility for future DIY modifications
I installed my first system professionally because I valued time over money and worried about roof leaks. No regrets it was done perfectly in two days and has never leaked. My second system (expansion from 400W to 800W) I did myself because I understood the process and saved $1,200 on labor that added minimal value.
My recommendation: If you’ve never worked with electrical systems or feel uncomfortable with tools, pay for professional installation. The peace of mind is worth the premium. If you’re mechanically inclined and have a free weekend, DIY saves significant money without major risk if you work carefully.
Calculating Your Personal Payback Period
The generic payback calculations I showed earlier assume specific camping patterns. Here’s how to calculate yours:
Annual boondocking nights: Count realistically, not optimistically. My first year I planned 80 nights and actually camped 52.
Avoided campground fees per night: Full-hookup RV parks average $45-$80 depending on location. Use your typical campground costs.
System total cost: Include everything components, installation, tools, mistakes, extras.
Formula: System cost ÷ (annual nights × avoided fees) = years to payback
My example:
- System cost: $4,680 (professional install, mid-range components)
- Annual boondocking: 70 nights (realistic average)
- Avoided fees: $55/night (my typical campground cost)
- Payback: $4,680 ÷ ($55 × 70) = 1.2 years
After 1.2 years, every night boondocking is pure savings. Over the 15-year lifespan of quality components, that’s $57,750 in avoided campground fees. The economics are compelling if you actually camp frequently.
But be honest with yourself. If you realistically camp 20 nights annually and half those are at free BLM land anyway, a $6,000 solar system will take 15+ years to break even. Your money might be better invested elsewhere.
The Biggest Mistake: Building Too Small
I’ve helped three friends plan solar systems. All three initially wanted to build the smallest, cheapest system possible. All three eventually upgraded within 18 months because their initial system couldn’t keep up with real usage.
The problem? Undersized systems force generator use, which defeats the entire point of solar. You haven’t achieved energy independence you’ve just added expensive equipment to your existing generator-dependent lifestyle.
My friend Tom spent $1,800 on a 200W system that couldn’t keep up with his actual consumption. Eighteen months later, he spent another $2,400 expanding to 500W. If he’d built 500W initially, he’d have spent $3,200 and avoided the hassle of reworking everything. He wasted $1,000 by building too small.
Size for your realistic needs plus 30% headroom for weather variability. Yes, it costs more upfront. But it delivers actual energy independence rather than partial solutions that still require generator backup.
Understanding your true power requirements and matching them to appropriate system capacity is foundational to building effective off-grid capability but equally important is selecting the right charge management technology that efficiently converts solar production into stored battery power throughout varied conditions.
learn more about optimizing your entire power system for reliable boondocking and complete energy independence
2 thoughts on “RV Solar System Cost – Complete Breakdown by Size (2026 Prices)”