Author

Author: Mike Dawson
39 years old, RV traveler and gear power specialist.
I’m Mike, 39. I travel often and I’ve spent years learning how to make campervan living simple, comfortable, and independent. Solar power changes everything. It turns your camper into a quiet, self-sufficient home that lets you choose where to stay, for how long, without worrying about hookups. In my guide to responsible caravaning solutions, I explain how smart energy choices directly shape travel comfort and sustainability.
1) Start by Understanding Your Real Daily Energy Use:
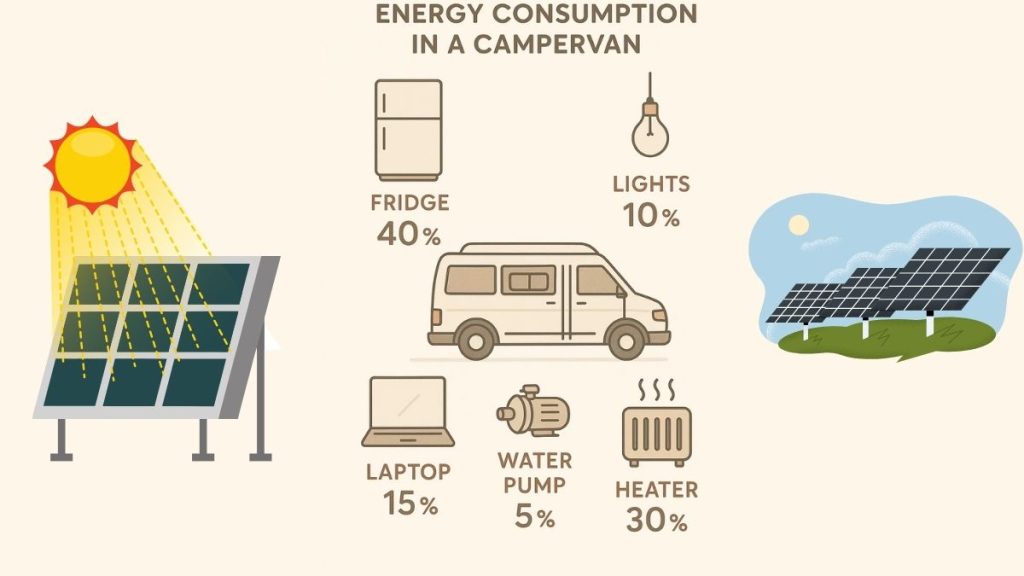
List your devices, note their wattage and usage time. Calculate Wh/day.
Example daily use:
Understanding how your devices consume energy is the foundation of building a reliable off-grid setup. This principle is also at the core of our complete campervan solar power guide, where we break down how to size panels, batteries, and daily energy loads step by step. If you’re designing a complete RV solar setup, make sure you check our full guide on RV Solar Power for beginners. Solar generator for RV: complete guide for power and autonomy .
| Device | Power × Time | Result |
| Device | Power × Time | Result |
| LED lights | 10 W × 4 h | 40 Wh |
| 12V fridge | 45 W × ~10 h runtime | 450 Wh |
| Laptop | 60 W × 2 h | 120 Wh |
| Water pump | 30 W × 0.5 h | 15 Wh |
| Fan | 8 W × 5 h | 40 Wh |
Total: ~665 Wh/day
Add 20–30% for weather + system losses → 800–900 Wh/day
This number is the base for sizing your battery and solar.
2) Battery and Solar Panel Sizing:
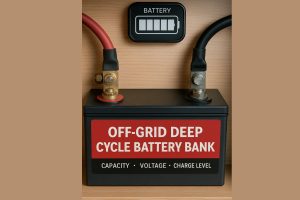
Battery Capacity
Use:
Battery Ah = Wh per day / (12 V × usable depth of discharge)
- LiFePO₄ (Lithium) (80% usable):
900 Wh / (12 V × 0.8) ≈ 94 Ah → Choose ~100 Ah LiFePO₄ - AGM (50% usable):
900 Wh / (12 V × 0.5) ≈ 150 Ah → Choose ~160–200 Ah AGM - For a broader look at how solar setups work together in real travel conditions, our complete campervan solar power guide explains each component and how it affects daily autonomy.
Solar Panel Wattage
Use:
Solar W = Wh per day / (sun hours × 0.7 efficiency factor)
Assuming ~4 sun hours average:
900 / (4 × 0.7) ≈ 320 W
So, most people thrive on 300–400W solar.
3) Choosing the Right Hardware:
Choosing the right setup depends on your van’s roof shape, how often you move, and the climates you travel through. This solar panel guide for campervans helps you compare practical installations and understand what will work best for your everyday lifestyle.

Panels
| Type | Best Use | Notes |
| Rigid | Most vans | Durable, efficient, performs better in heat |
| Flexible | Curved roofs / weight limits | Hot surfaces reduce output faster |
| Portable / suitcase | Camping in shade | Can chase the sun manually |
Rigid panels are usually the best match for standard van roofs, especially if your travel style involves long stays and consistent sunlight exposure. They form the core of many reliable setups highlighted in our complete solar power guide.
Charge Controllers
- MPPT → Best performance, especially in changing sun conditions
- PWM → Only for very small, low-cost systems
Batteries
- LiFePO₄ → Light, long life, charges fast, best for frequent travel
- AGM → Budget-friendly but heavier, slower charging
4) Example Real-World Setups:
Solo Traveler (Light Use)
- 200W solar
- 20A MPPT
- 100Ah LiFePO₄
- Cost range: $650–$900
Couple Traveling Full-Time
- 320–400W solar
- 30–40A MPPT
- 150–200Ah LiFePO₄
- Cost range: $1,600–$2,400
Family / High Usage
- 400–600W solar
- 40–50A MPPT
- 200–280Ah LiFePO₄
- Optional portable 120–200W panel
- Cost range: $2,200–$3,500
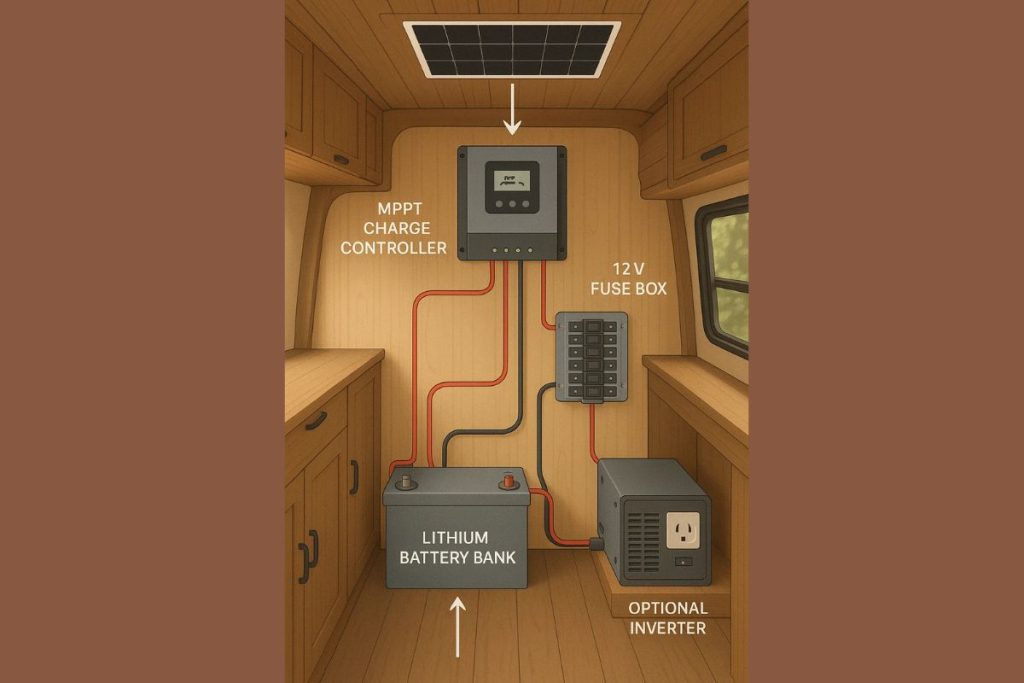
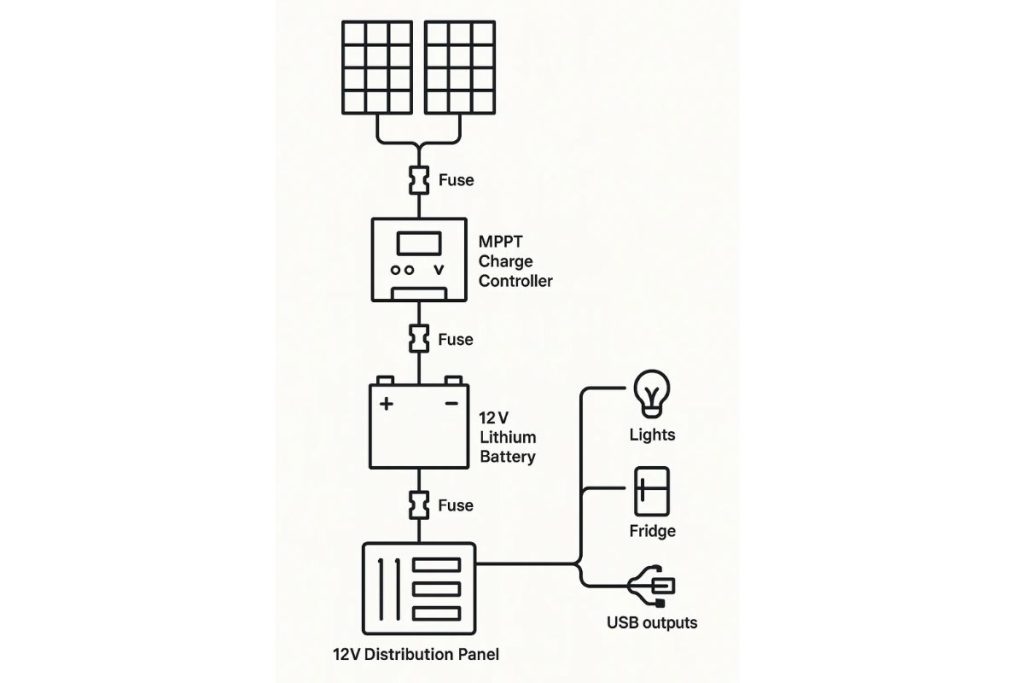
5) Wiring Layout (Simple and Safe):
Panels → Fuse → MPPT → Fuse → Battery → (Distribution Panels → Fridge / Lights / USB / Inverter)
Rules that prevent fires:
- Always fuse close to power sources (panel + battery)
- Use proper wire gauge to avoid voltage drop:
- 0–20A → 10–12 AWG
- 20–40A → 8–6 AWG
- 40–80A → 6–4 AWG
- Seal roof penetrations with polyurethane sealant
- A clean wiring layout makes your solar system safer and much easier to maintain. It follows the same logic explained earlier when sizing your panels and battery.
Bond negative bus to vehicle chassis ground
6) Real Performance Factors:
| Factor | Effect | Tip |
| Heat | Lowers efficiency | Leave air gap under panels |
| Shade | Can kill output by 50–80% | Avoid roof vents casting shadows |
| Cheap cable / wrong gauge | Voltage drop → wasted power | Size wiring correctly |
| PWM on large panels | Power waste | Choose MPPT for 200W+ systems |
7) Daily Use & Maintenance:
- Clean panels monthly with soft cloth + water
- Check cable tightness every few months
- Monitor current, not just voltage (use shunt monitor)
Store LiFePO₄ at 50–60% if unused for long periods

8) Cost Overview (USD):
| System | Typical Cost |
| 200W solar + MPPT + 100Ah LiFePO₄ | $650–$1,000 |
| 400W solar + MPPT + 200Ah LiFePO₄ | $1,600–$2,400 |
| Foldable 120–200W suitcase panel | $200–$450 |
Invest first in the battery and charge controller.
Panels are easy to expand later.

Conclusion:
A well-planned solar setup doesn’t just power your van. It gives you independence. It lets you choose slow mornings, quiet nights, remote views, and fewer compromises. It’s one of the most meaningful upgrades you can make.
To complement your energy autonomy, explore compact caravan accessories tested on the road, which help keep your living space organized and comfortable without adding clutter.