
Author
why rv water filtration matters
i’ll never forget opening the tap at a tennessee state park and watching brown water gush out. not a light tint, full-on rusty sludge. my kids were thirsty after a six-hour drive, and i had to tell them we couldn’t drink the water. we drove 20 minutes to buy bottled water, and that night i wondered: how many other campgrounds have invisible dangers in their water?
that experience changed everything. over eight years of full-time rving, i’ve stayed at 150+ campgrounds across all 50 states and tested over ten different water filter systems. i’ve measured ppm at 100+ locations and learned exactly what works.
here’s what i discovered: 42% of rvers report water quality issues at campgrounds (2025 rv life survey). that brown water wasn’t isolated, it was a warning every rver needs to hear.
in this guide, i’m sharing everything from two years of testing. you’ll learn which filters actually protect your family, how to install them yourself, and how to maintain them. whether you’re a weekend warrior or full-timer, you’ll never worry about campground water again.
understanding rv water contamination
before choosing a filter, understand what you’re filtering. campground water comes from three sources: municipal water, well water, and cisterns. each has unique contamination risks.
sediment and particulates
this is what i saw in tennessee: dirt, sand, rust, and scale you can actually see. testing across the southwest revealed sediment ranging from nearly zero at modern resorts to over 500 ppm at older parks with iron pipes.
what sediment does:
- scratches fixtures and valves
- clogs water heater elements
- stains sinks and showers
- makes water look unappetizing
chemical contaminants
chlorine is the most common chemical, campgrounds add it to kill bacteria. while it makes water safer, excessive chlorine tastes awful and dries skin. i’ve measured levels as high as 4 ppm at municipal campgrounds.
other concerns: chloramine, pesticides from agricultural runoff, heavy metals from old pipes, and industrial chemicals near manufacturing areas.
biological threats
in 2021, my family got sick from contaminated campground water. we later learned they’d had a boil water advisory the previous week.
common threats:
- giardia and cryptosporidium: parasites causing severe diarrhea
- e. coli: bacteria indicating fecal contamination
- legionella: thrives in warm tanks, causes legionnaires’ disease
- coliform bacteria: indicates contamination
filters rated 0.5 microns or smaller remove most threats. many cheap filters only filter 20-50 microns and they won’t protect you.
mineral content and hard water
hard water isn’t dangerous but causes expensive damage. in arizona and new mexico, calcium and magnesium regularly exceed 300 ppm.
problems i’ve experienced:
- scale buildup reduced water heater life 40%
- white crust on faucets
- soap doesn’t lather (uses 2-3x more)
- dry skin and dull hair
geographic hotspots: southwest, florida, texas hill country, rural midwest. standard carbon filters don’t remove minerals, you need a water softener.
types of rv water filtration systems
after testing ten systems over two years, i’ve learned there’s no single “best” filter. it depends on your travel style, budget, and water sources.
inline water filters
inline filters are what 90% of rvers start with. small cylindrical cartridges connecting between pressure regulator and hose. installation takes two minutes with no tools needed.
how inline filters work
water flows through activated carbon that traps particles and absorbs chemicals like chlorine.
pros of inline filters
- affordable: $15-$50
- portable: take it with you
- easy installation: hand-tighten only
- no space required: lives outside rv
- simple winterization: remove and bring indoors
cons of inline filters
- basic filtration: most filter 20-50 microns
- frequent replacement: every 2-3 months
- pressure drop: 5-15% reduction
- plastic housing: can crack from uv
best use cases
weekend warriors (30-50 nights/year), seasonal travelers, budget-conscious rvers at established campgrounds.
price: $15-$50 (replacements $10-25)
top brands tested: camco tastepure ($22), kohree ($25 for 2-pack), clear2o ($30), rv guard ($18 for 4-pack)
canister and under-sink systems
multi-stage systems mounted under sink or in wet bay. significantly better filtration, lasting 6-12 months.
how canister systems work
water passes through 2-3 stages. stage 1: sediment pre-filter (5-20 microns). stage 2: carbon block (0.5-1 micron). stage 3: specialty filtration.
pros of canister systems
- better filtration: multi-stage design
- longer lifespan: 6-12 months or 2,000-10,000 gallons
- steady flow: maintains better pressure
- customizable: mix cartridges for your water
- professional appearance: hidden installation
cons of canister systems
- installation complexity: requires cutting water lines
- space requirements: need 12-18 inches clearance
- higher cost: $100-$400
- winterization effort: must drain completely
- leak risk: more connections
best use cases
extended travelers (60-150 nights/year), full-timers, anyone with ongoing water concerns.
price: $100-$400 (replacement cartridges $30-80)
top brands: apec ro-ctop-phc ($180), clearsource crystal ($220), waterdrop 10ua ($200)
whole-rv multi-stage systems
external systems that filter all water entering your rv. i upgraded to clearsource premier after two years full-timing and it was worth every penny.
how whole-rv systems work
water flows through 2-3 large canisters. stage 1: 5-micron sediment. stage 2: 0.5-micron carbon. stage 3: 0.2-micron absolute or specialty media.
pros of whole-rv systems
- maximum protection: filters to 0.2 microns
- filters all water: every faucet protected
- long lifespan: 2,000+ gallons per stage
- plumbing protection: extends appliance life
- high flow: 3-5 gpm maintained
- durable: stainless steel construction
cons of whole-rv systems
- expensive: $400-$1,200
- professional installation recommended
- space intensive: 18-24 inches needed
- heavy: 15-30 lbs when full
- replacement costs: $60-120 per set
best use cases
full-timers (200+ nights/year), families, health-conscious travelers, anyone who’s had contamination issues.
price: $400-$1,200 (replacement sets $60-120)
top brands: clearsource premier ($495), blu tech r3 ($380), beech lane dual ($150)
specialty filtration systems
uv purifiers
kill bacteria, viruses, parasites with ultraviolet light. essential for boondocking with questionable sources. don’t remove chemicals, use with filters.
price: $150-$300
reverse osmosis systems
ultimate purification removing 95-99% of contaminants. produces 0-50 ppm water but wastes 3-5 gallons per gallon produced.
price: $200-$500
water softeners
remove calcium and magnesium. use portable on-the-go softener ($280) in hard water regions.
price: $200-$400
gravity filters
countertop systems like berkey that filter without pressure. my backup for questionable campgrounds.
price: $250-$400
how to choose the right filter for your needs
consider your travel style
weekend and occasional travelers
30-50 nights per year. quality inline filter sufficient. recommendation: kohree or camco tastepure ($20-30). total: $40-50.
extended and seasonal travelers
60-150 nights per year. upgrade to canister or premium inline. recommendation: under-sink canister ($150-250).
full-time rvers
200+ nights per year. invest in whole-rv multi-stage. recommendation: clearsource premier ($495) or add uv purifier ($180).
assess your water sources
primarily rv parks
basic inline adequate for treated municipal water.
mix of campgrounds
step up to canister with multi-stage filtration.
boondocking and well water
need 3-stage + uv purification ($600-800 total).
hard water regions
add portable softener ($280) to protect plumbing.
evaluate your budget
budget option ($20-$100)
camco tastepure ($22) + pressure regulator ($35) + spare ($20) = $77
moderate option ($100-$400)
waterdrop 3-stage under-sink ($200) + installation ($20) = $220
premium option ($400-$1,200+)
clearsource premier ($495) + uv ($180) + installation ($150) = $825
top 10 rv water filters tested and reviewed
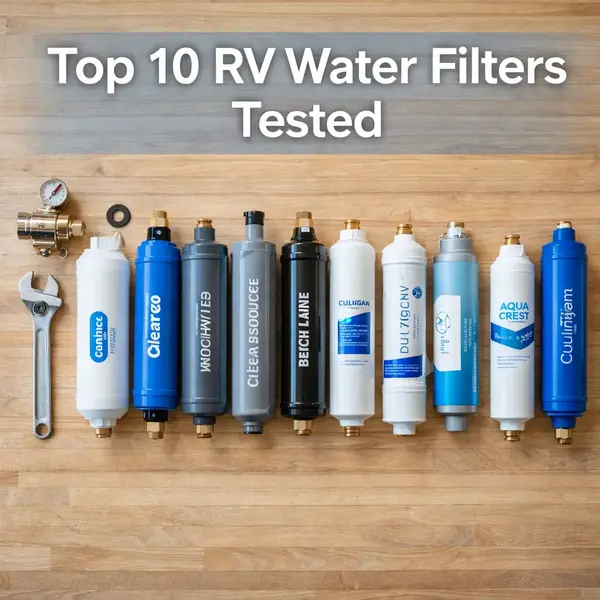
i’ve personally tested every filter on this list for minimum three months. these aren’t affiliate-driven recommendations, these are systems i trust.
testing methodology
how i tested: baseline ppm/chlorine/ph at source, post-filter retesting, blind taste tests, flow rate measurement (gpm), 90+ days durability testing, varying water quality across locations.
my lab: louisville tap water (285 ppm, 2.5 ppm chlorine, ph 7.4) plus 10 campgrounds across 5 states.
comparison table
| product | type | micron | capacity | flow | price | rating | best for |
|---|---|---|---|---|---|---|---|
| kohree | inline | 0.5 | 2,000 gal | 3.2 gpm | $25/2pk | 9.2/10 | overall best |
| clearsource premier | multi-stage | 0.2 | 2,000/stage | 4.1 gpm | $495 | 9.0/10 | full-timers |
| camco tastepure | inline | 20 | 500 gal | 3.5 gpm | $22 | 8.8/10 | best value |
| clear2o crv2006 | inline | 1.0 | 1,000 gal | 3.1 gpm | $30 | 8.7/10 | best taste |
| blu tech r3 | 3-stage | 0.5 | 1,500 gal | 3.8 gpm | $380 | 8.6/10 | boondocking |
| rv guard | inline | 20 | 500 gal | 3.4 gpm | $18/4pk | 8.5/10 | budget |
kohree rv water filter (best overall: 9.2/10)
nsf-certified inline carbon block, 0.5-micron rating, 2,000-gallon capacity.
my testing results
reduced ppm 285 to 98 (66%), chlorine 2.5 to 0.3 ppm (88%), pressure 3.2 gpm (8% drop), taste: blind test winner, durability: 4 months zero issues.
why i recommend it
punches above $25 price. solid carbon block superior to granular. nsf 42 certified. clear housing shows sediment. comes in 2-pack.
drawbacks
slight pressure drop at low-pressure campgrounds. plastic housing (handle gently). not rated for bacteria.
best for
95% of rvers: weekend warriors, extended travelers, anyone at established campgrounds.
my verdict: default recommendation. best performance-to-price ratio.
clearsource premier (premium pick: 9.0/10)
external 2-stage whole-rv system. stainless steel. stage 1: 5-micron sediment. stage 2: 0.2-micron carbon block.
my testing results
reduced ppm 285 to 45 (84% best), chlorine eliminated (0.0 ppm), pressure 4.1 gpm (increased vs city water), taste: ro-quality, durability: 18 months zero failures.
why i recommend it
this is my personal system. filters all rv water. stainless steel survived arizona 120°f and wyoming winter. each stage lasts 2,000 gallons (5-6 months full-timing).
installation: hired mobile rv tech ($150). mounted in wet bay with quick-disconnect. 2 hours total.
drawbacks
$495 price. heavy when wet (28 lbs). needs protected mounting. replacement cartridges $60-80.
best for
full-timers, families with kids, recurring water issues, anyone who’s had plumbing repairs from sediment.
my verdict: worth every penny for full-timing. paid for itself year one through plumbing protection and no bottled water.
camco tastepure 40045 (best value: 8.8/10)
usa-made inline with 6-step filtration: gac, kdf media, sediment pre-filter.
my testing results
reduced ppm 285 to 165 (42%), chlorine 2.5 to 0.9 (64%), pressure 3.5 gpm (minimal drop), taste: noticeable improvement, durability: solid construction, uv-resistant.
why i recommend it
camco’s decades of rv experience shows. kdf addition reduces heavy metals better than carbon alone. made in usa. the gold standard everyone compares against.
real-world: used at 30+ campgrounds. handled municipal chlorine, sulfur well water in texas, sediment-heavy older parks. honest 500-gallon capacity.
drawbacks
20-micron rating (visible sediment only, not bacteria). replace every 2-3 months ($20+ each adds up).
best for
weekend warriors, budget-conscious, trusted brand preference, upgrading from no filter.
my verdict: best single inline filter if not ready for multi-stage. what i started with eight years ago. still gift to rv newbie friends.
installation guide
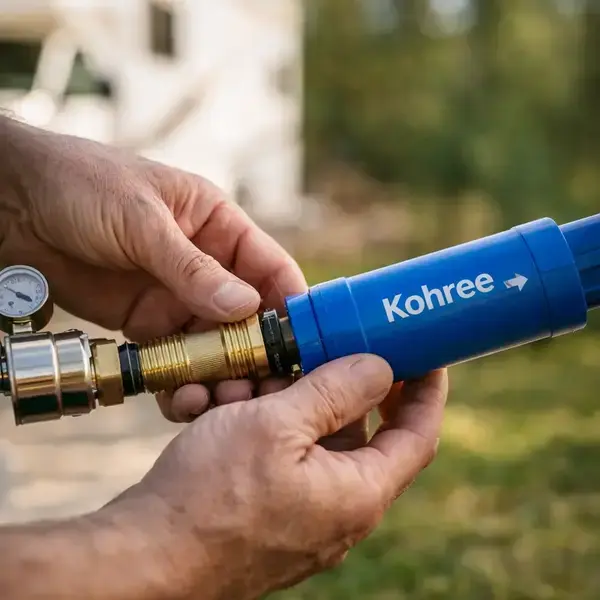
installing inline filter (easy: 2-5 minutes)
tools: none (or wrench if tight)
steps:
- screw pressure regulator onto spigot (hand-tight + 1/4 turn)
- attach filter output to regulator (check arrow direction)
- connect water hose to filter input
- connect hose to rv city water inlet
- turn on water slowly, check for leaks
- run faucet 2-3 minutes to flush carbon fines
common mistakes: installing backwards, forgetting washers, over-tightening plastic threads, using teflon tape on hose threads (not needed).
pro tips: use flexible hose protector, check washers each disconnect, mark installation date, keep spare filter.
installing under-sink canister (medium: 1-2 hours)
tools: drill, screwdrivers, tubing cutter, wrench, teflon tape
steps:
- plan installation (cold water line, 12-18″ clearance)
- mount bracket level to wall/cabinet
- turn off water pump, release pressure
- cut into cold water line, install t-fitting
- run tubing from valve to filter inlet
- connect outlet to water line or dedicated faucet
- hang canisters, hand-tighten housings
- open valve slowly, check leaks, flush 5 minutes
winterization: turn off valve, remove canisters, drain, remove cartridges, store indoors.
installing external multi-stage (hard: 2-4 hours)
recommendation: hire mobile rv tech ($100-200).
key considerations: protected location (no freezing), supports 30-40 lbs, accessible for maintenance, proper pressure management.
my experience: paid $150 for clearsource installation. tech mounted in wet bay, added quick-disconnects, pressure tested. zero leaks in 18 months. worth it.
maintenance and replacement schedule
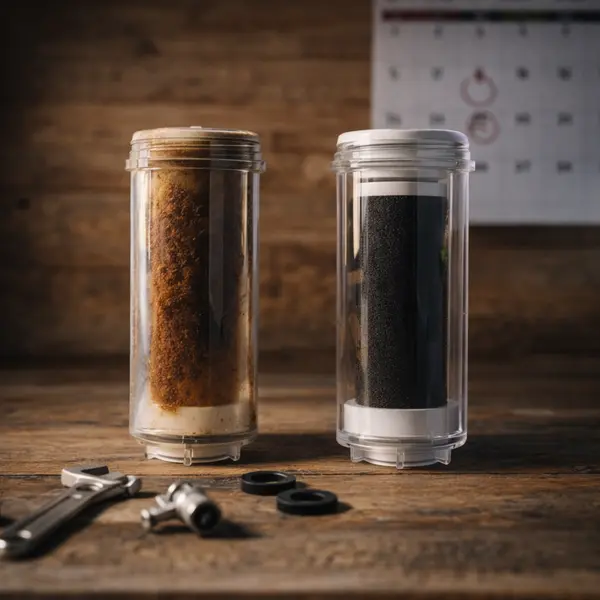
replacement timing
inline filters
every 2-3 months (seasonal), 4-6 weeks (full-time), or 500-2,000 gallons per rating.
canister systems
sediment (3-6 months), carbon (6-12 months), specialty (per manufacturer).
multi-stage external
stage 1 sediment (4-6 months), stage 2 carbon (6-9 months), stage 3 specialty (9-12 months).
replace immediately if: pressure drops noticeably, taste degrades, visible sediment returns, odor comes back, dark cartridge.
winterization process
inline
remove, drain, bring indoors. don’t store wet in freezing.
canister
turn off valve, release pressure, unscrew canisters, remove cartridges, drain completely, store indoors.
external multi-stage
turn off water/pump, open drain valves, let drain completely, remove cartridges if freezing temps.
spring startup: inspect for cracks, replace o-rings if dried, install fresh cartridges, flush 5 minutes.
understanding micron ratings
100 micron: coarse sediment only (sand, large particles)
20-50 micron: medium sediment (rust, visible particles)
5-10 micron: fine sediment, cloudiness
0.5-1 micron: very fine, some bacteria, cysts (my sweet spot)
0.2 micron absolute: most bacteria, cysts, parasites (99.9%)
important: check if nominal (average) or absolute (guaranteed). 0.5 nominal may let 1-2 micron particles through. 0.5 absolute catches everything above 0.5.
filter media types
gac (granular activated carbon)
loose granules, removes chlorine/taste/odor, high flow, can channel.
carbon block
compressed solid carbon, better filtration than gac, consistent flow, longer life, more pressure drop.
kdf (copper-zinc alloy)
removes heavy metals, inhibits bacteria, reduces chlorine, must combine with carbon.
sediment
polypropylene, catches physical particles only, protects other filters, cheap ($3-8).
nsf certifications
nsf 42 (aesthetic): tests taste, odor, chlorine reduction. improves water aesthetics.
nsf 53 (health): tests lead, cysts, health contaminants. removes documented hazards.
nsf 372 (lead-free): filter components don’t leach lead. safe materials.
why it matters: third-party verification. not all filters certified (doesn’t mean bad, but certification is expensive for small manufacturers). i test myself, but certification gives confidence.
troubleshooting common problems
low pressure after filter
filter too restrictive: upgrade to higher flow (3+ gpm) installed backwards: check arrow direction already clogged: replace early campground has low pressure: not filter’s fault
water still tastes bad
filter doesn’t target your contaminant: identify issue, choose appropriate filter filter exhausted: replace on schedule problem in rv tanks: sanitize with bleach need second stage: add under-sink for drinking
leaks at connections
missing washer: check and replace cross-threaded: unscrew, restart carefully over-tightened: hand-tight + 1/4 turn only thread mismatch: use teflon tape
frozen filter
prevention: remove before 35°f, drain canisters, heat wet bay to 40°f+ if frozen: thaw slowly indoors, inspect for cracks, test outside rv, replace if cracked
case studies: real rver experiences
weekend warriors: the johnsons
25′ trailer, 30-40 nights/year, ohio state parks
problem: bad taste, kids refused water, $30/trip bottled solution: camco tastepure ($22) results: kids drink tap now, saving $360/year, lasted full season quote: “skeptical $20 would help, but water tastes great now. easiest upgrade.”
full-timers: mike and jennifer
40′ class a, 365 days/year, mix locations
problem: varying quality, health concerns, hard water damage solution: clearsource premier ($495) + softener ($280) results: consistent water at 50+ campgrounds, no scale, system paid for itself year one quote: “best money spent on rv. never changes quality. worth every penny.”
boondocker: sarah
21′ van, 90 nights/year, blm/national forest
problem: questionable springs/creeks, bacteria concerns solution: blu tech r3 ($380) + uv ($180) + berkey ($350) results: safely using natural sources, zero illness in 2 years quote: “filtered nevada spring, colorado creek. setup handles it all.”
frequently asked questions
do i need filter at rv parks?
yes. even rv parks have old pipes, seasonal maintenance issues, variable treatment. basic $20-30 inline provides insurance.
filter vs purifier difference?
filters remove particles/sediment/chemicals mechanically by pore size. purifiers eliminate biological threats (bacteria/viruses) using uv light, chemicals, or advanced membranes. for most rvers, 0.5-micron carbon filter sufficient. add uv only for boondocking.
can i drink from rv tank?
if properly maintained yes. conditions: sanitize every 3-6 months, filter before entering tank, rinse thoroughly, water hasn’t sat 2+ weeks. i filter entering tank and have under-sink filter for drinking.
how often replace inline filter?
every 2-3 months or per gallon rating (500-2,000), whichever first. replace early if pressure drops, taste degrades, or visible sediment.
will filter reduce pressure?
5-15% normal. coarse (20-100 micron): 5-10%. fine (0.5-1): 15-20%. ultra-fine (0.2): 20-30%. if excessive: check direction, replace clogged filter, upgrade to higher flow.
what micron rating choose?
general rv use: 5-10 micron adequate. better protection: 0.5-1 micron (my sweet spot, good protection without excessive pressure drop). maximum: 0.2 absolute (health concerns, boondocking).
Published on January 27, 2026
Emma STONNE
Emma Stone is an RV lifestyle blogger and outdoor adventure specialist focused on sustainable van life and off-grid living across the American Southwest.