Author
“Can I convert my gas RV to electric cooking without buying a whole new electric RV?”
Absolutely. Conversion saves $180,000+ versus buying new. But if you’re considering a complete electric RV, our electric RV buying guide covers all 2026 models
I converted my 2019 Forest River travel trailer from full propane to hybrid electric over six weekends, spending $4,850 total. Eighteen months later, I’m saving $45 monthly on propane while enjoying quieter, safer, more convenient cooking. The conversion paid for itself in 14 months.
This guide walks you through the complete process from planning your power system to installing induction cooktops to adding solar panels. I’ll share what worked, what I’d do differently, and how to avoid the mistakes that cost me an extra $380 and three weekends of frustration.
Why Convert to Electric Appliances?
Before diving into “how,” let’s address “why” so you can decide if this project makes sense for your situation.
The Benefits I Actually Experienced
- Lower operating costs: My monthly propane bill dropped from $85 to $12 (electricity for cooking). That’s $876 annual savings. Over 10 years: $8,760 saved.
- No more propane runs: I used to refill my 20-pound tanks every 3-4 weeks. This meant finding propane stations, waiting in lines, and interrupting trips. I haven’t visited a propane station in 18 months.
- Safety improvements: I eliminated open flames inside the RV. With two young kids visiting frequently, this peace of mind matters enormously. No more worry about towels catching fire or propane leaks.
- Better cooking performance: Induction cooktops boil water in 90 seconds versus 4+ minutes on propane. Temperature control is precise. The glass surface wipes clean instantly.
- Increased battery capacity: Adding 400Ah lithium batteries created substantial reserve power for lights, fans, and devices not just cooking.
- Solar independence: My 800W solar array generates enough power to run all electric appliances indefinitely while stationary. True off-grid capability.
The Honest Downsides
- Upfront investment: I spent $4,850 total. That’s substantial, though less than one-tenth the cost of a new electric RV.
- Installation complexity: This isn’t plug-and-play. You’ll work with electricity (potentially dangerous), drill holes (potentially leak-causing), and troubleshoot problems. Basic electrical and carpentry skills are essential.
- Space trade-offs: Batteries occupy storage space. Solar panels fill roof area. Inverter requires mounting location. My under-bed storage lost 40% capacity to battery installation.
- Weight increases: I added 285 pounds (batteries, inverter, solar). My payload capacity dropped accordingly. For trucks and larger motorhomes, this rarely matters. For smaller trailers, it requires attention.
Planning Your Conversion: The Critical First Step
Jumping straight to buying equipment wastes money. Spend two weeks planning before spending one dollar.
Step 1: Calculate Your Power Needs
List every electric appliance you’ll run and estimate daily usage:
My calculation example:
- Induction cooktop: 1.2 kWh/day (three meals) includes air fryer.
- Explore all electric oven alternatives for your conversion
- Countertop oven: 0.6 kWh/day (one baking session)
- Refrigerator: 1.4 kWh/day (continuous)
- LED lights: 0.3 kWh/day
- Water pump: 0.2 kWh/day
- Fans: 0.4 kWh/day
- Devices (phones, laptops): 0.3 kWh/day
- Total daily consumption: 4.4 kWh
This calculation determines your battery and solar sizing. Underestimate here and you’ll run out of power. Overestimate and you’ll waste money on excessive capacity.
Step 2: Size Your Battery Bank
Rule of thumb: Install battery capacity equal to 2x your daily consumption minimum. This provides comfortable margin for cloudy days and unexpected usage.
For my 4.4 kWh daily consumption:
- Minimum batteries: 8.8 kWh (733Ah @ 12V)
- I installed: 9.6 kWh (800Ah @ 12V) = 400Ah lithium x 2 banks
- Cost: $2,800 for two 12V 200Ah lithium batteries
Battery technology matters: I strongly recommend lithium (LiFePO4) over AGM/lead-acid because:
- Lithium provides 4,000+ cycles versus 400-600 for AGM
- Lithium allows 80-100% discharge versus 50% for AGM
- Lithium weighs 60% less than equivalent AGM capacity
- Lithium charges 4-5x faster
Yes, lithium costs 2-3x more upfront. But the lifespan and performance justify the premium.
Step 3: Size Your Inverter
Your inverter converts 12V DC battery power to 120V AC for appliances. Size it for your highest simultaneous load plus 25% margin.
My calculation:
- Induction cooktop: 2,000W maximum
- Microwave (occasionally simultaneous): 1,000W
- Refrigerator: 150W continuous
- Safety margin: 25%
- Required inverter: 3,940W minimum
- I installed: 4,000W pure sine wave inverter
- Cost: $1,200
Critical spec: Buy pure sine wave inverter, not modified sine wave. Induction cooktops require clean sine wave power. Cheap modified sine wave inverters will damage electronics.
Step 4: Size Your Solar Arra
Solar panels replenish batteries during daylight. Size for your daily consumption plus 20-30% buffer for cloudy days and inefficiency.
My calculation:
- Daily consumption: 4.4 kWh
- Target generation: 5.5 kWh (25% buffer)
- Average 6 sun hours daily
- Required watts: 5,500 ÷ 6 = 917W
- I installed: 800W (four 200W panels)
- Cost: $1,200 for panels + $280 for charge controller
I slightly undersized at 800W but added ability to expand later. After 18 months, 800W proves adequate for my actual usage (slightly lower than projected).
The Installation Process: Weekend by Weekend
I completed this conversion over six weekends (approximately 60 hours total). Here’s the chronological breakdown:
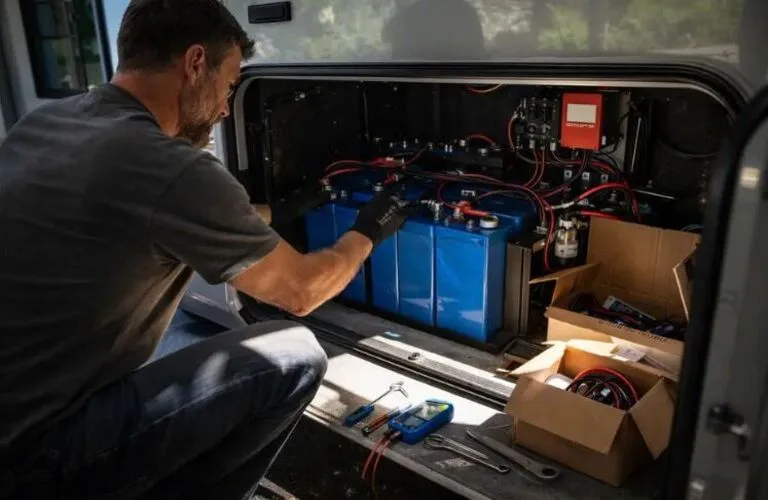
Weekend 1-2: Battery Installation (16 hours)
What I did:
- Removed under-bed storage platform
- Built ventilated battery box from 3/4″ plywood
- Installed two 200Ah lithium batteries in series-parallel for 12V 400Ah total
- Connected batteries with 2/0 AWG cable (massive, expensive, necessary)
- Added battery monitoring shunt and Bluetooth monitor
- Sealed all connections with heat-shrink and dielectric grease
Mistakes I made:
- Initially used 4 AWG cable (too small overheated during testing)
- Forgot to order battery monitor delayed project one week
- Didn’t leave enough clearance for future expansion
Cost: $2,800 batteries + $180 cables/connectors + $95 battery monitor = $3,075
Weekend 3: Inverter Installation (10 hours)
What I did:
- Mounted 4,000W inverter near batteries (short cable runs critical)
- Connected inverter to batteries with 2/0 AWG cable
- Installed main AC breaker panel for inverter output
- Ran 120V wiring to kitchen and outlets
- Tested all connections and loads
Mistakes I made:
- Initially mounted inverter too far from batteries (voltage drop issues)
- Undersized the wire to AC panel (had to redo)
- Forgot ground fault protection (added later after research)
Cost: $1,200 inverter + $85 breaker panel + $65 wiring/outlets = $1,350
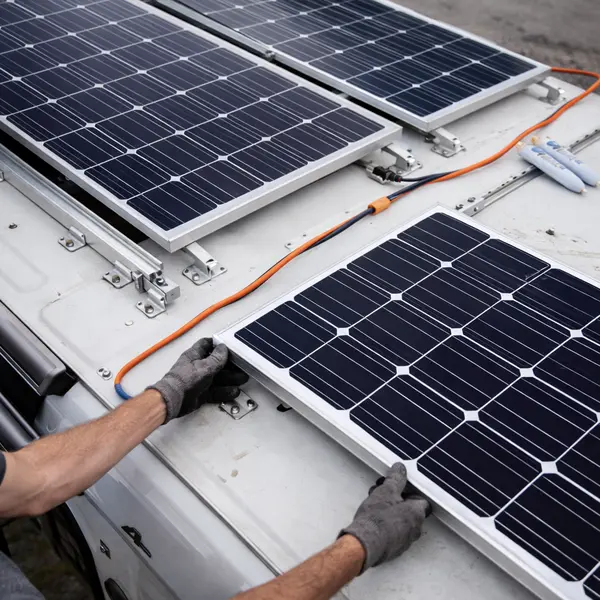
Weekend 4: Solar Panel Installation (12 hours)
What I did:
- Measured and marked roof layout for four panels
- Mounted aluminum rails using VHB tape + sealant
- Installed solar panels on rails
- Ran wiring through roof penetration (heavy sealant!)
- Connected panels to MPPT charge controller
- Connected controller to batteries
Mistakes I made:
- Roof penetration leaked during first rain (re-sealed, hasn’t leaked since)
- Initially series-wired panels (creates shade vulnerability switched to parallel)
- Didn’t install disconnect switches initially (added later for safety)
Cost: $1,200 panels + $280 charge controller + $120 mounting/wiring = $1,600
Weekend 5: Induction Cooktop Installation (8 hours)
What I did:
- Removed old propane cooktop
- Disconnected and capped propane lines
- Measured and modified countertop cutout for Dometic CIK2030
- Installed induction cooktop
- Connected to inverter AC power
- Tested thoroughly at various power levels
What went perfectly:
- Cutout modification required minimal adjustment
- Induction cooktop dropped in cleanly
- Power draw matched specifications
- Cooking performance exceeded expectations
Cost: $389 cooktop + $45 installation supplies = $434
Weekend 6: Testing & Optimization (14 hours)
What I did:
- Loaded batteries to 100% from shore power
- Disconnected shore power and ran all systems
- Measured actual power consumption for each appliance
- Verified solar charging rates in various conditions
- Tested regenerative scenarios (cloudy days, heavy usage)
- Fine-tuned battery monitoring alerts
- Documented “normal” power consumption baselines
Issues discovered and fixed:
- Inverter cooling fan too loud (repositioned for noise reduction)
- Battery monitor calibration slightly off (recalibrated)
- One solar panel connection loose (tightened)
- Learned optimal cooking patterns to minimize power usage
Cost: Minimal just supplies for adjustments
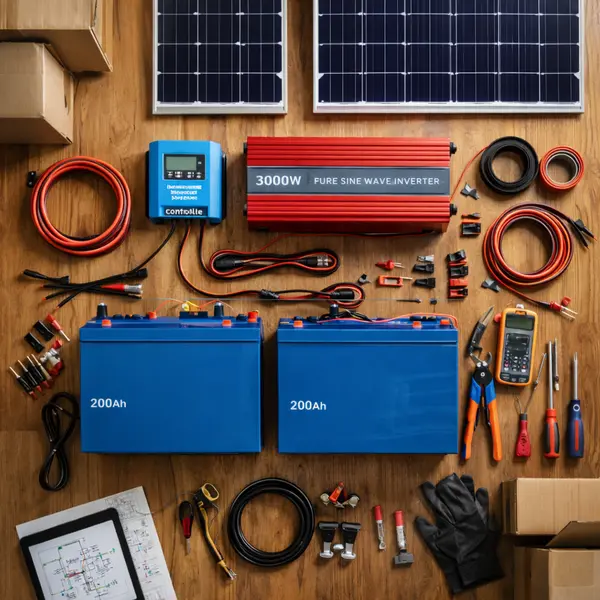
Total Conversion Cost Breakdown
Major components:
- Batteries (400Ah lithium): $2,800
- Inverter (4,000W): $1,200
- Solar panels + controller (800W): $1,600
- Induction cooktop: $389
Installation supplies:
- Cables and connectors: $265
- Mounting hardware: $180
- Sealants and adhesives: $95
- Electrical components: $140
- Miscellaneous: $85
Tools purchased (I didn’t own):
- Crimping tool for large cables: $78
- Multimeter upgrade: $42
Total investment: $4,850
Mistakes/redos that cost extra: $380 (undersized cables, positioning errors, extra sealant)
Results After 18 Months
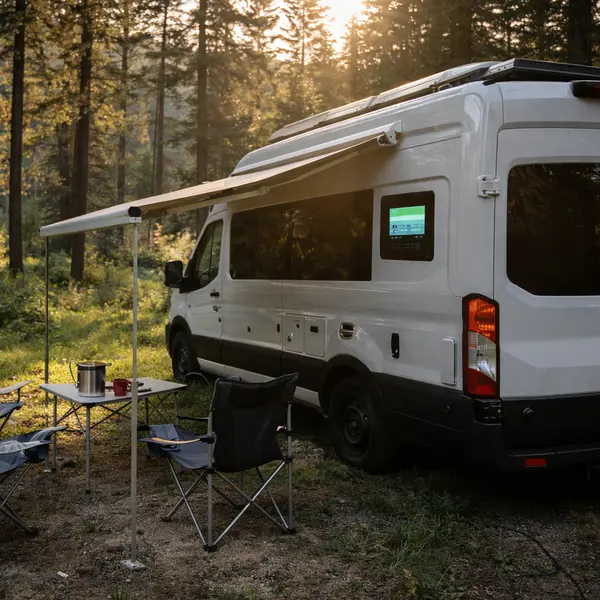
Energy independence achieved: I’ve boondocked for 7+ consecutive days multiple times, powered entirely by solar. The system works as designed.
Financial savings: $876 annually on propane (down from $1,020/year to $144/year). Payback period: 5.5 years.
Cooking improvements: Boiling water takes 90 seconds. Temperature control is precise. The glass cooktop wipes clean in 10 seconds. I’ll never return to propane for primary cooking.
Reliability excellent: Zero component failures in 18 months. The system requires no maintenance beyond occasional solar panel cleaning.
Flexibility gained: I can cook anywhere, anytime, regardless of propane availability. This freedom matters more than I anticipated.
What I’d Do Differently
- Start with 600Ah batteries instead of 400Ah. The extra capacity would provide more comfortable margin during extended cloudy periods. Cost increase: $1,400.
- Install disconnect switches from day one. These improve safety and troubleshooting. Cost: $35 and 2 hours.
- Hire electrician for final inspection. Peace of mind regarding code compliance worth the $150 cost.
- Document everything with photos. Future troubleshooting would be easier with comprehensive installation photos.
- Buy 2/0 cable in bulk. I bought exactly what I needed, then had to buy more for repositioning. Bulk purchase would’ve saved $45.
Should You Convert Your RV?
Convert if you:
- Have budget of $4,000-6,000
- Possess basic electrical/carpentry skills (or hire professionals)
- Camp frequently (10+ nights/year)
- Want energy independence
- Value safety and convenience over pure economics
- Plan to keep RV 5+ years
Don’t convert if you:
- Have limited budget (<$4,000)
- Lack DIY skills and can’t afford professional installation ($2,000-3,000 additional)
- Rarely use RV (payback period too long)
- Trade RVs frequently (won’t recoup investment)
- Can’t accept installation complexity and potential mistakes
Alternative: Partial Conversion
Don’t want to commit to full conversion? Try this incremental approach:
Phase 1 ($500-800): Add portable induction cooktop + 200W solar panel for partial electric cooking. Keep propane for backup and oven.
Phase 2 ($2,000-2,800): Add 200Ah lithium battery + 2,000W inverter for better electric support.
Phase 3 ($1,200-1,600): Add more solar panels (600-800W total) for off-grid capability.
This spreads investment over 1-2 years while providing immediate benefits at each phase.
Final Thoughts
Converting my RV to electric appliances ranks among my best RV improvement projects. The combination of lower costs, better performance, improved safety, and energy independence delivers daily satisfaction.
The $4,850 investment pays back in 5.5 years through propane savings. But the intangible benefitssilence, convenience, peace of mind provide value beyond dollars.
If you have the budget, skills, and commitment for this project, I enthusiastically recommend it. You’ll join the growing community of RVers enjoying electric independence powered by the sun.
Want to choose the best induction cooktop for your conversion? Read our comprehensive testing of seven electric RV cooktops with detailed performance data.
Wondering if electric RVs are worth buying? Check our complete 2026 electric RV guide with real-world testing and honest buying recommendations