
Author
If you’ve ever stared at your RV bathroom and thought, There has to be a better way you’re not alone. Whether you’re a weekend warrior or living full time on the road, the factory-standard RV bathroom is rarely built for real comfort. The good news? A full RV bathroom renovation doesn’t require a contractor a huge budget or even a free weekend. With the right DIY RV bathroom upgrades you can completely transform the space in stages and for far less than you’d expect.
This guide covers everything: how to renovate an RV bathroom step by step, the best products to use, budget friendly hacks, and the upgrades that matter most for full time living.
Why Renovate Your RV Bathroom?
Most RV bathrooms are designed to check a box, not to be lived in. Tiny sinks, weak shower pressure, zero storage and materials that look outdated on day one these are the hallmarks of a factory RV bathroom. If you use your rig more than a few weekends a year these frustrations compound fast.
An RV bathroom remodel doesn’t have to mean gutting the whole space. Strategic, targeted upgrades deliver the biggest return on time and money. And unlike a house renovation, most DIY RV bathroom improvements can be done with basic tools in a single afternoon.
How to Renovate Your RV Bathroom: Step by Step
Step 1 — Start with the Sink
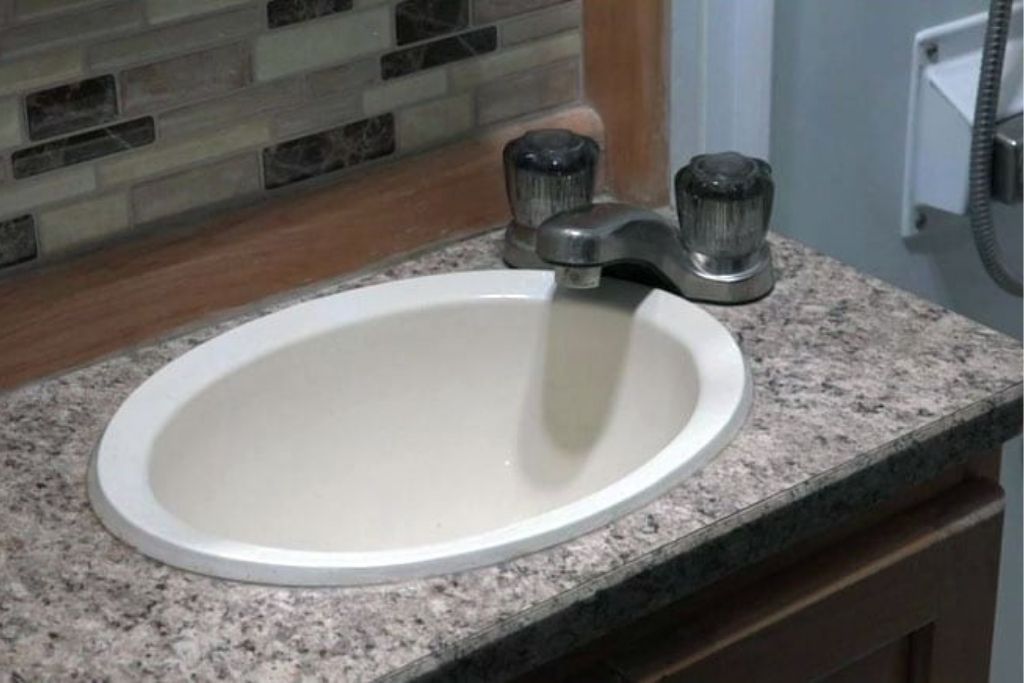
The RV sink is usually the first thing that feels inadequate. Factory basins are shallow and narrow, leading to water splashing everywhere. Swapping in a deeper vessel style sink paired with a high arc faucet is one of the most impactful RV bathroom upgrade ideas you can act on immediately.
What you’ll need:
- Vessel-style sink (hammered copper or stone look)
- High-arc faucet with flexible supply lines
- Bathroom-grade silicone sealant
Cost: $150–$200 | Difficulty: Easy
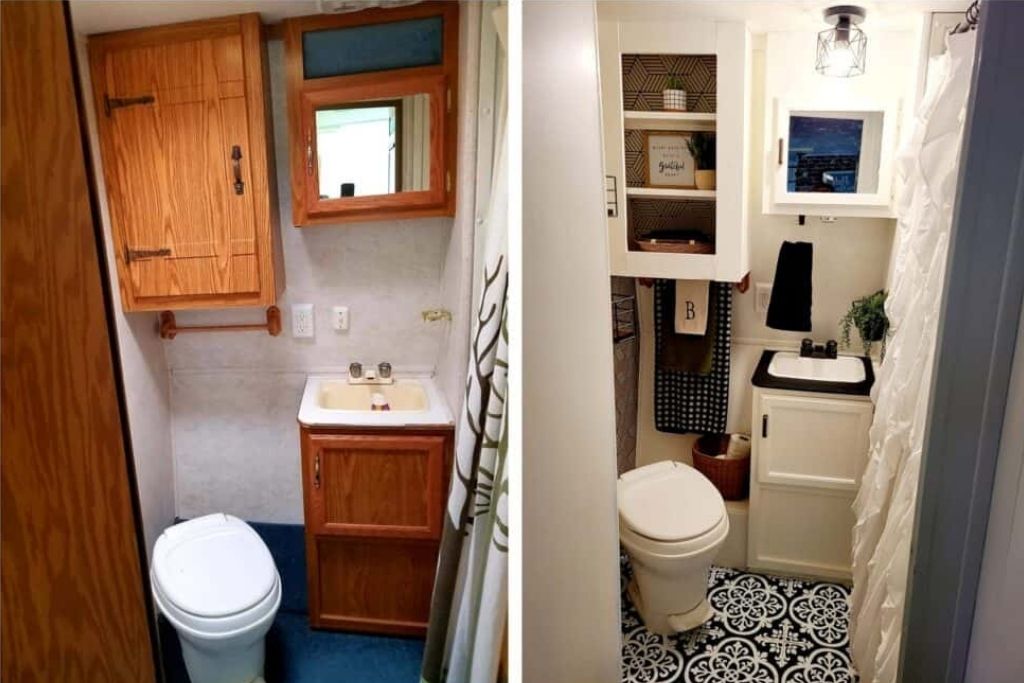
Step 2 — Refresh the Walls with Peel-and-Stick Wallpaper
Factory RV bathroom walls are often dull and dated. Peel-and-stick wallpaper applied directly over the existing surface is one of the most cheap RV bathroom upgrade ideas available and it holds up remarkably well through heat, humidity, and road vibration.
Choose a clean geometric or nature-inspired pattern. Take your time at corners and around outlets, using a credit card to smooth out bubbles. Total cost: under $50.
Step 3 — Add a Faux Tile Backsplash
A self-adhesive faux tile backsplash around the sink area ties the whole renovation together. Peel, trim, press into place that’s the entire job. It’s one of those cheap RV bathroom upgrade ideas that punches well above its price point.
Cost: $20–$40 | Difficulty: Easy
Step 4 — Create Smart Wall Storage
Counter space in an RV bathroom is precious. A strip of fabric shoe organizer pockets screwed horizontally into the wall creates instant, organized storage for toiletries, hair tools, and daily essentials. It’s one of the most practical best RV bathroom hacks for full-time living especially with multiple people sharing the space.
Cost: $10–$20 | Difficulty: Easy
Step 5 — Upgrade the Shower Experience
This is where the real transformation happens.
Replace the Showerhead Best First Step for Better RV Shower Pressure
Poor shower pressure is one of the most universal complaints in the RV world. The Oxygenics PowerFlow-RV is the go-to fix: it uses just 1.8 gallons per minute but delivers a noticeably stronger flow thanks to oxygen-infused technology. Five spray settings, two-minute installation, and an immediate upgrade to your daily shower.
This is the single best answer to how to improve RV shower pressure and it takes less time than making coffee.
Best RV shower head 2026 pick: Oxygenics PowerFlow-RV
Cost: $30–$50 | Difficulty: Easy
Swap the Glass Door for a Shower Curtain
A standard RV glass shower door can weigh 40+ pounds. Replacing it with an extendable curved shower curtain rod and a lightweight curtain frees up payload capacity, adds shoulder room in the shower, and gives you a drying rack for wet gear. For full-time RV living bathroom improvements, this is a no brainer.
Cost: $50–$80 | Difficulty: Easy
Add a Corner Splash Guard
No glass door means you need to control water spray. A 28-inch corner splash guard with self-adhesive strips installs in 15 minutes and eliminates water escape issues entirely.
Cost: $25–$40 | Difficulty: Easy
Install a Bamboo Shower Mat
RV shower pans flex under pressure especially near the drain. A bamboo shower mat distributes weight evenly, protects the drain connection, and adds a spa like aesthetic. It’s one of the most underrated RV bathroom accessories must have for long term use.
Cost: $30–$50 | Difficulty: Easy
Step 6 — Dress Up the Skylight
If your RV bathroom has a skylight, decorative stained-glass window cling film applied between the inner and outer layers transforms it from a plain plastic dome into a daily moment of beauty. Around $20, 20 minutes of work, and it lasts for years without fading.
Cost: $20–$30 | Difficulty: Easy
Step 7 — Install a Water-Saving Diverter (For Boondockers)
The ShowerMiser diverter routes cold startup water back into your fresh tank instead of down the drain conserving every gallon when you’re off-grid. A temperature reactive tube signals when water is hot and ready. It also lets you fill your fresh tank directly from the city water hookup bypassing the need for an exterior gravity fill port.
This is the most technical upgrade on the list but among the most rewarding for anyone serious about boondocking.
Cost: $60–$90 | Difficulty: Moderate
Budget Breakdown: Full RV Bathroom Remodel Costs
| Upgrade | Cost | Difficulty |
|---|---|---|
| Vessel sink + high-arc faucet | $150–$200 | Easy |
| Peel-and-stick wallpaper | $30–$60 | Easy |
| Faux tile backsplash | $20–$40 | Easy |
| Wall storage pockets | $10–$20 | Easy |
| Skylight window film | $20–$30 | Easy |
| Extendable rod + curtain | $50–$80 | Easy |
| Corner splash guard | $25–$40 | Easy |
| Bamboo shower mat | $30–$50 | Easy |
| ShowerMiser water diverter | $60–$90 | Moderate |
| Oxygenics showerhead | $30–$50 | Easy |
| Total | ~$425–$660 |
Compare that to a dealership RV bathroom remodel, which typically runs $3,000–$8,000 for similar results.
Best RV Bathroom Products to Buy in 2026
Looking for the best RV bathroom products for your renovation? Here are the top picks across key categories:
- Best RV sink for small bathroom: Hammered copper vessel sink deeper basin, modern look, contains splash
- Top RV shower head 2026: Oxygenics PowerFlow RV best balance of pressure and water conservation
- Best water saver: ShowerMiser diverter essential for boondocking and off-grid travel
- Best RV bathroom accessories must have: Bamboo shower mat, corner splash guard wall pocket organizer
RV Bathroom Hacks for Full-Time Living
If you’re living in your RV full time, here are the upgrades that make the biggest difference day to day:
- Wall pockets over countertop clutter : Keep surfaces clear with vertical storage
- Curtain rod instead of glass door : More room, less weight, easier access
- ShowerMiser diverter : Stretch your fresh water tank further off-grid
- Bamboo mat on the shower pan : Protect the drain, extend the life of your floor
- Oxygenics showerhead: End the weak pressure frustration once and for all
Final Thoughts: Where to Start Your RV Bathroom Renovation
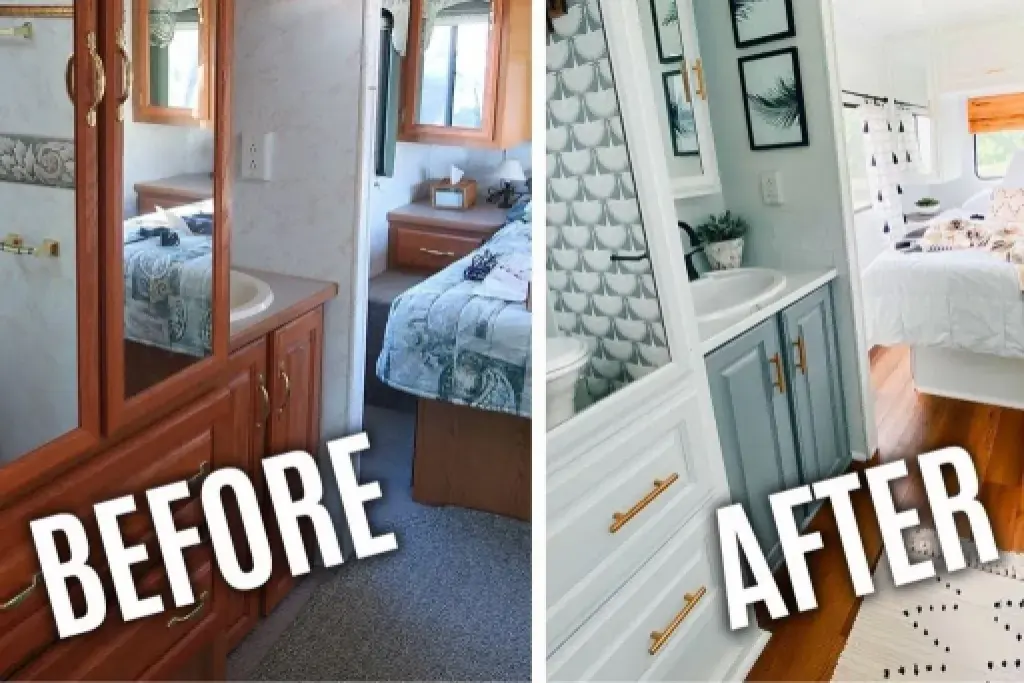
The best DIY RV bathroom renovation strategy is simple: pick one upgrade, do it this weekend, and let the momentum build. Most people start with the showerhead (fastest win), move to the sink and wallpaper (biggest visual transformation), and work their way through the rest over a few weeks.
You don’t need to spend thousands or hire anyone. The tools are basic, the products are affordable, and the results speak for themselves. Whether you’re planning a full RV bathroom remodel or just targeting one or two improvements, every upgrade makes life on the road more comfortable and more yours.
Have a favorite RV bathroom upgrade that didn’t make this list? Share it in the comments the community is always looking for the next great idea.